glTF & DirectX part3 - architecture
Following the initial intro post see /3d/c%23/coroutines/dx11/fluent/glb/gltf/treeview/uwp/2018/05/25/gltf-directx.html I’m going to write a few follow up posts to highlight some of my learnings from writing this sample. This one is on the design of the code sample. All of the code can be found here https://github.com/Microsoft/glTF-DXViewer
Architecture
The foundations of the app are a C++, UWP app which has a SwapchainPanel within which it can host the DirectX content loaded from a glTF/glB file
A glB file has the same data as a glTF file but it is combined into one single self-contained binary. To parse these you can read the JSON document and then reference the buffers, textures, etc. from other locations in the file.
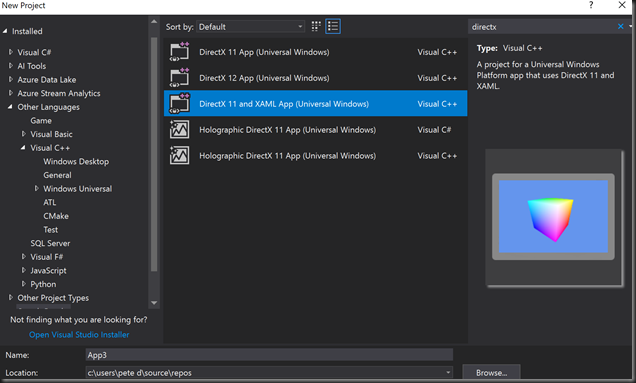
If you choose the appropriate workload when installing Visual Studio 2017 you will have a project template available which
Has a ‘DirectX 11 and XAML App (Universal Windows)’ which is how the sample code started life. The template has quite a lot of boilerplate code, most of which is still present in the sample, but it has a XAML layer for describing 2D UI elements and a SwapChainPanel which hosts the DirectX content. The XAML part of the app employs an MVVM-style which binds ViewModel data to the UI declaratively using x:Bind syntax in the XAML (see below for more MVVM).
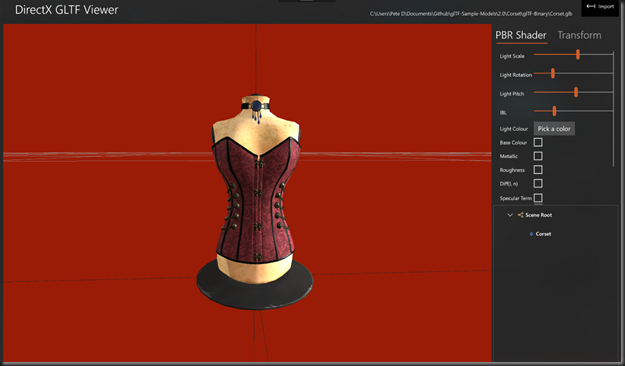
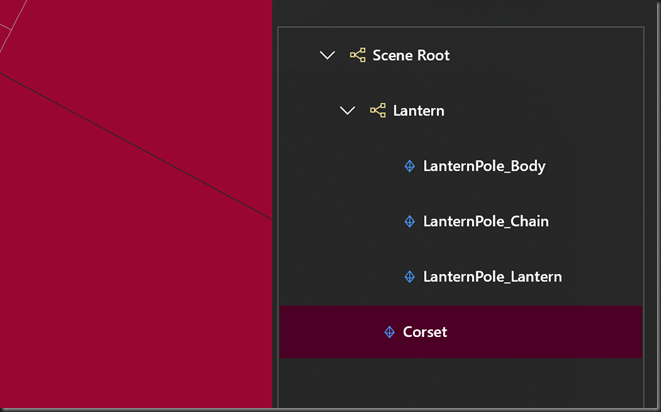
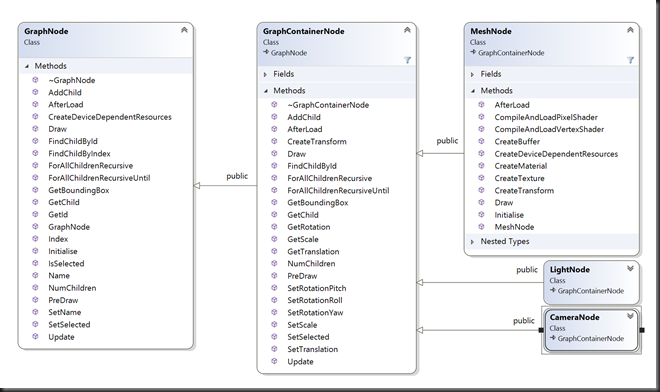
The SwapChainPanel hosts data to be rendered using DirectX and that data is mostly tied up within the SceneGaph. The SceneGraph itself is a basic composite structure where its contents are represented by a GraphNode base class. A GraphNode can have children and so a graph can be formed by linking parents with children and also a GraphNode can be subclassed to provide a visual representation. This mirrors a scene hierarchy specified in the glTF specification and provides hierarchical transformation inheritance such as you would find in scene descriptions in most graphical software. The scene hierarchy is visualised by the TreeView in the right-hand panel which shows the parent and child nodes with different icons and the relationships between them. The ViewModels communicate with the scene graph using the Observer pattern.
The data for the app is represented as a glTF/glB file and it is loaded into memory as a scene graph. The base class for this is a GraphNode, with GraphContainerNode adding transforms and children such that transforms from a parent are inherited by the children. The main subclass is MeshNode which deals with the buffers for rendering a mesh; e,g, index and vertex buffers, keeping a reference to a material, which in turn references a shader and shader inputs which are most-commonly textures.
MVVM
I used the Model-View-ViewModel pattern as it helps to keep the UI separate from any logic. The sample has a ViewModel layer which gets databound to the visual elements described in XAML markup and the UI updates are handled by the app runtime. Databinding is all done with x:Bind so the binding code is all generated at Runtime. The ViewModels derive from ViewModelBase which has code to help with change notifications to the UI layer by implementing INotifyPropertyChanged.
Design
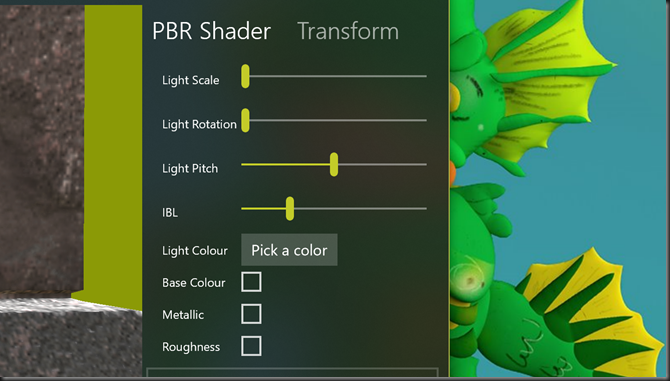
I have utilised aspects of Fluent design including Acrylic material and reveal highlights.
Notice how the control panel above has a nice translucent effect which allows my desktop background to visible beneath. Also, as I move my mouse over the controls they appear as if lit from the position of the mouse cursor. More on fluent design here https://docs.microsoft.com/en-us/windows/uwp/design/fluent-design-system/ . Using Acrylic was as simple as swapping the Brush used by the required XAML element (see https://docs.microsoft.com/en-us/windows/uwp/design/style/acrylic). For the reveal highlight styles can be used, i.e. I used ButtonRevealStyle here:
<Button Grid.ColumnSpan="2" x:Name="colorPickerButton" Content="Pick a color" Style="{StaticResource ButtonRevealStyle}" />
Dependencies
Initially used vcpkg and Nuget to help manage the dependencies for this project. Vcpkg provides a way to manage versioning and configuring Visual Studio for using Open Source C and C++ libraries. I initially started using boost::signals2 but since this is a code sample I think it helps to reduce dependencies and I replaced it with Subject a custom template class supporting the bare minimum of a publish/subscribe mechanism. Although I am no longer relying on vcpkg it has a large portfolio of projects supported and in other projects I found it supported pretty much everything I needed. Further details are here https://github.com/Microsoft/vcpkg I also used Nuget to pull in Microsoft.glTF.CPP which is published by Microsoft and handles serialising and deserialising glTF files. This screenshot shows Nuget integration with Visual Studio so I can search the Nuget package source from within the IDE and installing takes care of any admin the package needs to integrate with your project as well as its dependencies and also additions like signing license agreements if needed.
Microsoft have also published an open source glTF toolkit https://github.com/Microsoft/glTF-Toolkit to help creation, optimisation and conversion of glTF assets for Windows Mixed Reality.



Comments