wp7 pathlistbox
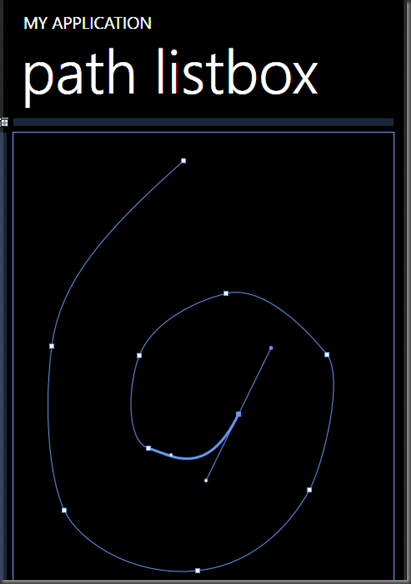
Since the new Mango developer tools were just released I wanted to write a quick post on PathListBox since I have been looking for an excuse to give it a try. PathListBox allows layout of list box items along an arbitrary path (see PathListBox). So, after installing the Mango developer tools http://www.microsoft.com/downloads/en/details.aspx?FamilyID=77586864-ab15-40e1-bc38-713a95a56a05&displaylang=en, I created a standard Windows Phone 7 project (targeting 7.1). I opened it in Blend and using the pen tool drew a path and removed any fill or stroke colours…
I then added a PathListBox from the tool box and in it’s property pane, under the Layout Paths section clicked the target icon next to ‘Select an object to use as a Layout path’, and then choose the path. Now any items subsequently added to the PathListBox will be positioned on this path.
I created a ViewModel class and bound it to the DataContext of the MainPage…
        public MainPage()
        {
            DataContext = new ViewModel();
            InitializeComponent();
        }
The ViewModel and Items started out like the following:
public class ViewModel
{
    private int _count;
    public ObservableCollection<Item> Items { get; set; }

    public ViewModel()
    {
        Items = new ObservableCollection<Item>();
        AddItem();
        AddItem();
        AddItem();
        AddItem();
        AddItem();
        AddItem();
    }

    public void AddItem(object parameter = null)
    {
        Items.Add(new Item { Name = "Item " + _count++ });
    }

    public void RemoveItem(object parameter)
    {
        Items.RemoveAt(Items.Count - 1);
    }
}

public class Item
{
    public string Name { get; set; }
}
which gave some data to bind the view to.
I then bound the ItemsSource of the PathListBox to our Items list in xaml and edited the Distribution property to give an even layout along the path, as follows:
           <mec:PathListBox HorizontalAlignment="Left"
                             Height="100"
                             VerticalAlignment="Top"
                             Width="100"
                             ItemsSource="{Binding Items}">
                <mec:PathListBox.LayoutPaths>
                    <mec:LayoutPath SourceElement="{Binding ElementName=path}" Distribution="Even"/>
                </mec:PathListBox.LayoutPaths>
            </mec:PathListBox>
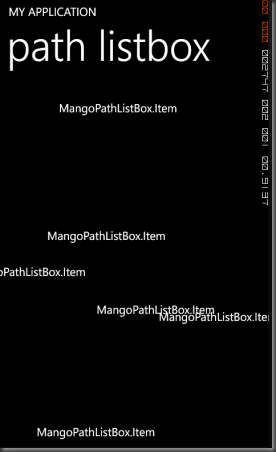
At this stage, running in the Emulator gave,
So, we need to tell the ListBox how to display each data item. We can do this in Blend by editing the PayjListBox’s ItemTemplate. I just added a TextBlock bound to the Name property of the Item class.
        <DataTemplate x:Key="DataTemplate1">
            <Grid>
                <TextBlock Text="{Binding Name}" />
            </Grid>
        </DataTemplate>
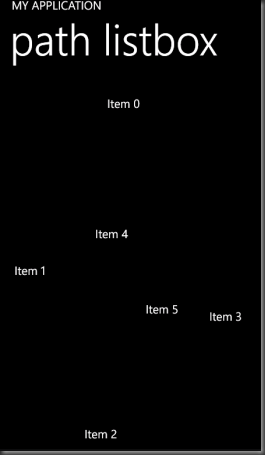
This gave,
Which is a fairly interesting list box, but what really brings it to life is adding a FluidMoveBehavior to the Layout Panel and then triggering some layout updates. I did this as follows:
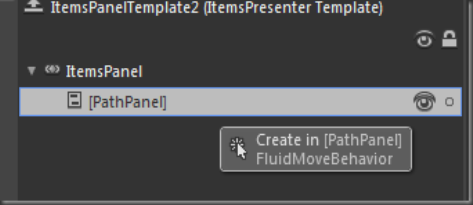
Edit the PathListBox’s ItemPanel template in Blend and drag n drop a FluidMoveBehavior (from the Assets Pane) onto the PathPanel.
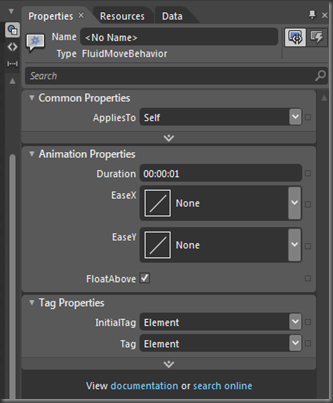
You can select the FluidMoveBehavior and edit some of it’s properties to control the nature of the transitions it will produce.
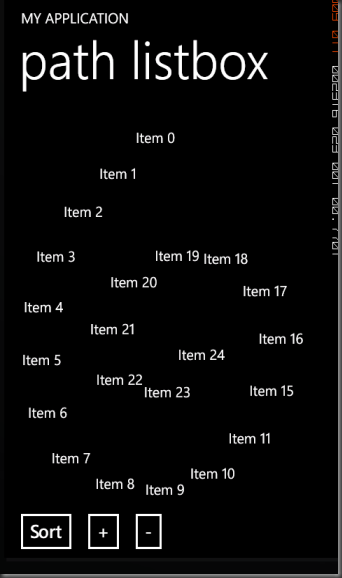
You must set the ‘Applies To’ property to ‘Children’ so that the transitions are applied to the children of the layout panel. In order to see the animations I added some buttons for sorting the list and adding and removing items from the list. I made use of the new Commanding support and added ICommand implementing properties on my ViewModel which I bound to the buttons.
            <StackPanel Orientation="Horizontal"
                        Grid.Row="1"
                        d:IsHidden="True">
                <Button Content="Sort"
                        Command="{Binding SortCommand}" />
                <Button Content="+"
                        Command="{Binding AddCommand}" />
                <Button Content="-"
                        Command="{Binding RemoveCommand}" />
            </StackPanel>
            SortCommand = new ProxyCmd(Sort);
            RemoveCommand = new ProxyCmd(RemoveItem);
            AddCommand = new ProxyCmd(AddItem);
The result is a a pleasing, dynamic, fully functioning ListBox.
The source code is available here http://cid-4f1b7368284539e5.office.live.com/self.aspx/.Public/MangoPathListBox/MangoPathListBox.zip
Technorati Tags: Mango,tools,PathListBox,items,path,FamilyID,Blend,tool,pane,Layout,icon,Select,ViewModel,DataContext,MainPage,InitializeComponent,_count,ObservableCollection,Item,AddItem,parameter,Name,RemoveItem,RemoveAt,Count,data,ItemsSource,Distribution,HorizontalAlignment,Left,VerticalAlignment,Width,LayoutPaths,LayoutPath,SourceElement,ElementName,Emulator,ListBox,PayjListBox,ItemTemplate,TextBlock,DataTemplate,Grid,Text,life,FluidMoveBehavior,Panel,Edit,ItemPanel,template,Assets,PathPanel,nature,Children,ICommand,StackPanel,Orientation,Horizontal,IsHidden,True,Button,Content,Sort,Command,SortCommand,AddCommand,RemoveCommand,ProxyCmd,Where,implements,Also,CollectionViewSource,result,Paths,transitions,animations,developer
WordPress Tags: Mango,tools,PathListBox,items,path,FamilyID,Blend,tool,pane,Layout,icon,Select,ViewModel,DataContext,MainPage,InitializeComponent,_count,ObservableCollection,Item,AddItem,parameter,Name,RemoveItem,RemoveAt,Count,data,ItemsSource,Distribution,HorizontalAlignment,Left,VerticalAlignment,Width,LayoutPaths,LayoutPath,SourceElement,ElementName,Emulator,ListBox,PayjListBox,ItemTemplate,TextBlock,DataTemplate,Grid,Text,life,FluidMoveBehavior,Panel,Edit,ItemPanel,template,Assets,PathPanel,nature,Children,ICommand,StackPanel,Orientation,Horizontal,IsHidden,True,Button,Content,Sort,Command,SortCommand,AddCommand,RemoveCommand,ProxyCmd,Where,implements,Also,CollectionViewSource,result,Paths,transitions,animations,developer



Comments