HoloLens Content Pipeline (remap materials)
As with any 3D project it is important when working with HoloLens to understand and streamline the content pipeline from content creation or procurement through to optimised models running inside the final app. If you are creating the assets in-house or have access to the creators and can get them to modify their process then great but this isn’t always going to be the case. Maybe you are building a proof-of-concept and need to source models quickly, possibly by purchasing from an online 3D catalogue or you have access to 3D assets but the creator is no longer available to provide modifications moving forwards.
On a HoloLens project when sourcing models from elsewhere the first thing I look to do is to reassign the materials to either optimised custom shaders or those from the HoloToolkit for Unity. These will ensure that the framerate of your app will be maximised – at least, in terms of fill rate of the display. Now, suppose that you source a model which has a complex hierarchy and a large number of sub-meshes and seams with a lot of materials and material assignments.
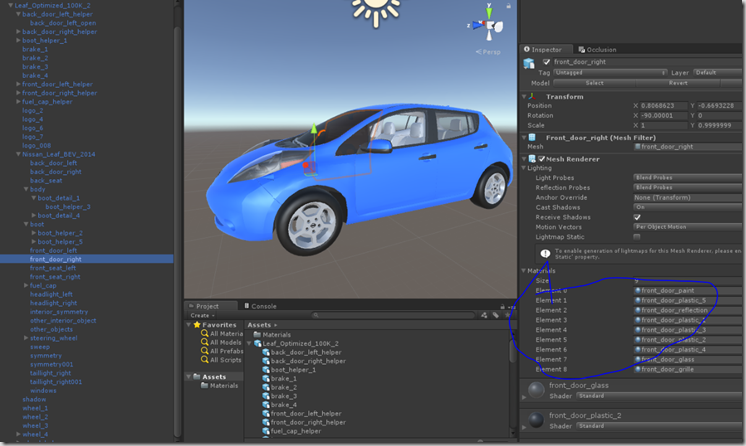
Here’s an example of a car model I used in a recent project – notice the model hierarchy on the left and the list of materials for one of the selected children shown on the right.
Going through this ‘by hand’ could be fairly time-consuming. Now suppose that you have been through this by hand and then you determine that the meshes themselves need to be optimised for number of vertices/triangles. You send the original model off to a 3D modeller who sends it back after the optimisation and the process of exporting the model from whichever 3D software is used now recreates materials using Unity standard shaders and you are faced with the task of remapping all of the HoloToolkit shaders again.
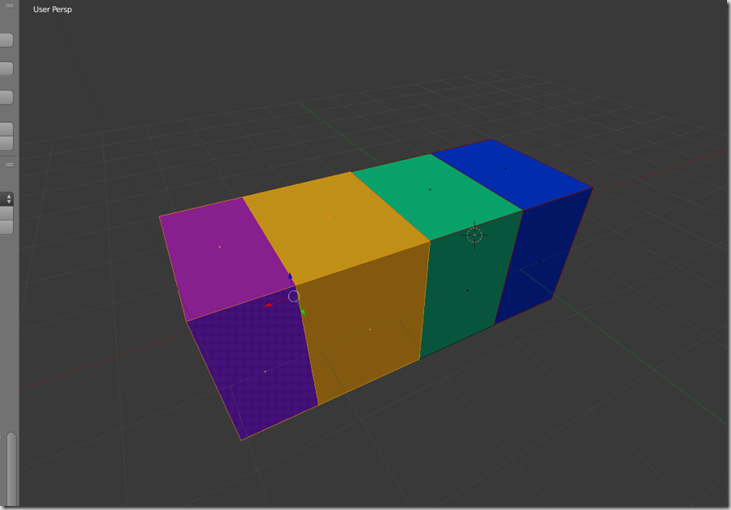
Luckily Unity provides a way to remap the materials by having it search for matching materials by name on import. To illustrate, I created a cube, extruded one face a few times and applied different materials to each section like this:
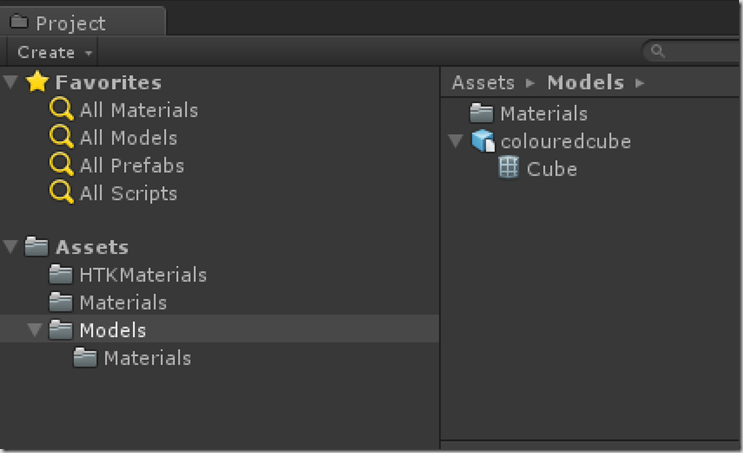
I named the materials purple, yellow, green and blue respectively. I exported the model as an FBX file and dragged it into the Unity assets folder. This brings the model in as a prefab with a materials folder alongside like this:
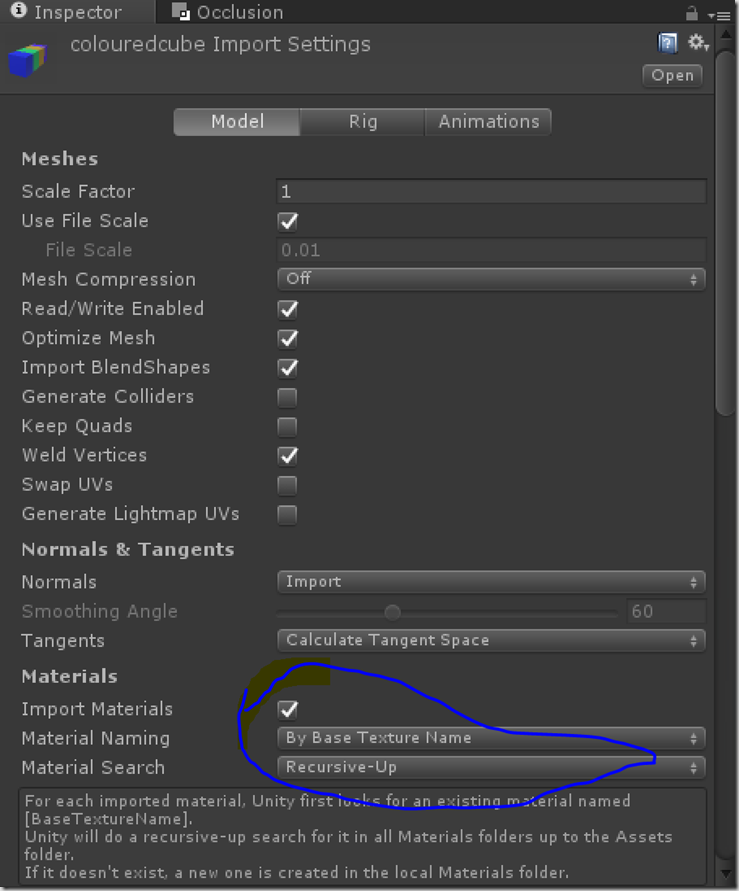
There is a material generated for each of the purple, yellow, green and blue materials. If you select the model prefab the inspector will show some settings useful to control how the materials are imported.
These settings allow you to define a set of materials elsewhere in your project that will be mapped to those on the prefab instead of the auto-generated ones. I created a Materials folder and created some new materials using the naming convention shown below:
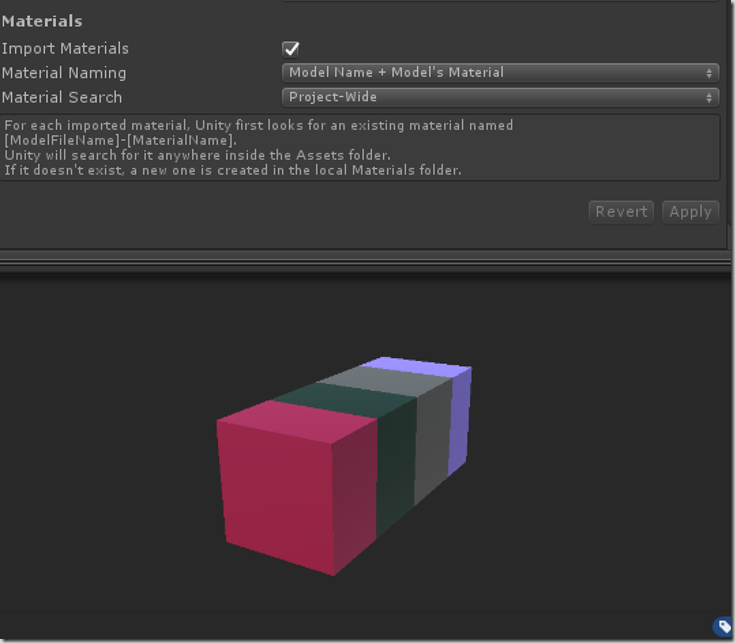
I then changed the Prefab Model settings for the Material Naming setting to use ‘Model Name + Model’s Material’ and I changed the Material Search setting to ‘project wide’ and the result is shown here:
You can find the Unity docs for this feature here https://docs.unity3d.com/530/Documentation/Manual/HOWTO-importObject.html
My prefab takes the materials I defined in my project so in my scenario I could define my HoloToolkit shader materials here andjust reload any updated FBX files and they will have the correct materials. This is great but in my particular scenario I had a lot of materials that were all exactly the same but with different names so for me it would have been more flexible to have been able to define a many to one mapping which can’t really be done by matching names.
Fortunately, it is very easy to extend Unity and so I could simply write some code to generate the mapping that I wanted and be able to save and load those mappings as required.
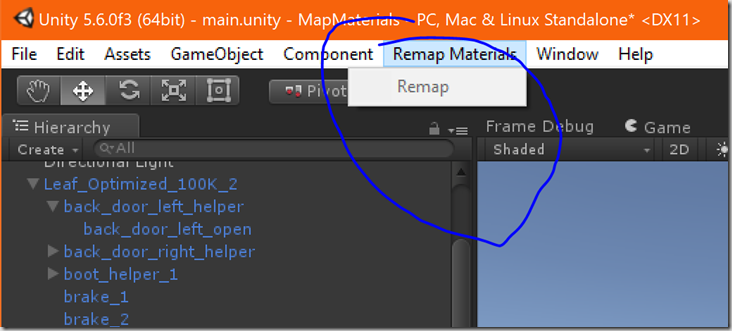
To create a Unity menu item as shown the following code was used:
And the following function shows how the materials were replaced:
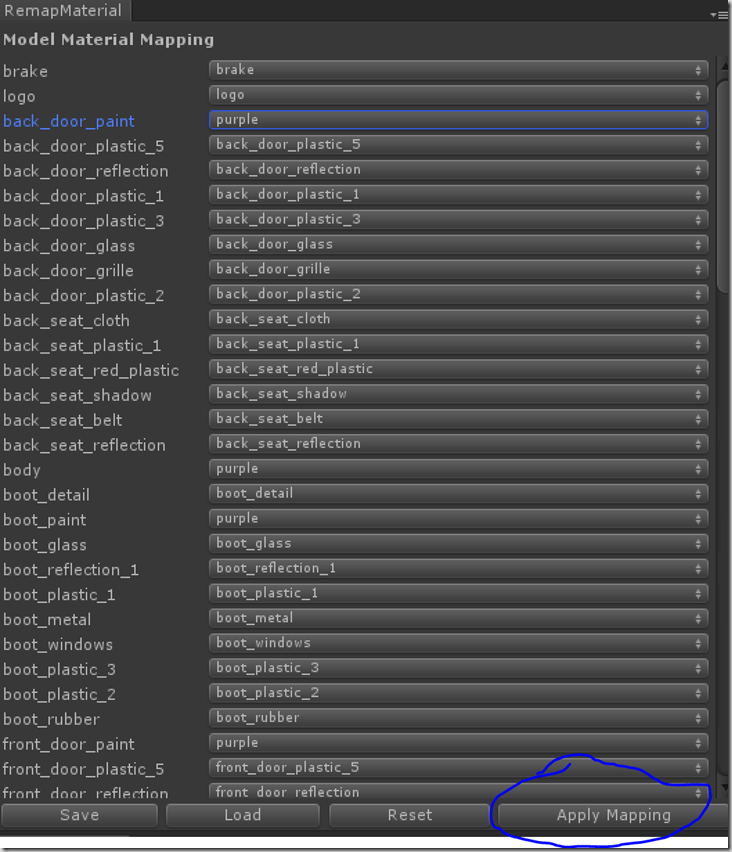
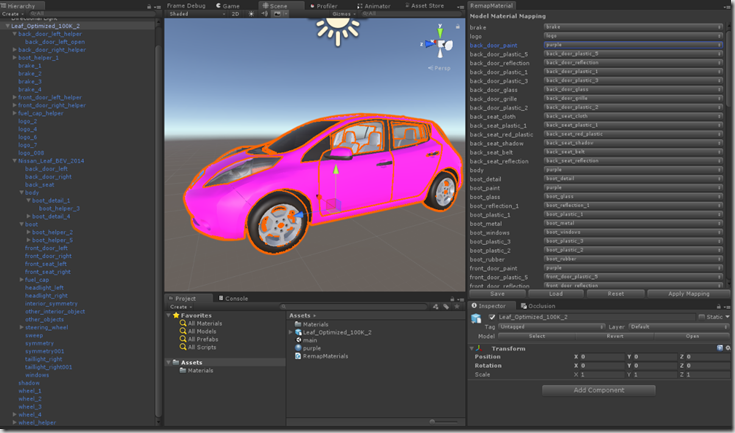
To illustrate usage I have loaded the original car model from above and created a new material with a purple colour called ‘purple’ and have used my custom editor tool to remap all of the blue paint materials to the purple material.
When clicking the Apply button the materials get replaced and you also have the option to save/load the mapping. Here’s a summary of what the tool actually does:
- enumerates the materials on the ‘selected’ item and display a label for each (I selected the whole car in my example)
- create a dropdown for each labelled material containing all materials in the project
- when Apply clicked build the mapping in code and apply the material changes
Its a bit rough around the edges but serves a purpose and the source code is provided here https://github.com/peted70/hololens-map-material



Comments