
Azure Speech Studio for Mixed Reality

Introduction
It is not uncommon that a Mixed Reality experience requires more user guidance than traditional applications; partially because the user may not be familiar with the capabilities of the application but also because they may not be accustomed to using Mixed Reality applications in general. Sometimes you need to encourage a user to stand in the correct place or interact with a hologram in a particular way. How you can achieve this in a Mixed Reality app may differ according to time/budget and resources available. I think this breaks down into a handful of different categories that can be used separately or in a more symbiotic way:
- Use of an assistant. This can range from a full AI-driven 3D avatar to the baseline speech and text which is the subject of this article.
- Novel user experience techniques. I'm always reminded of the use of the hummingbird in the HoloLens out-of-box setup which is used to encourage the user to hold out their hands. They are rewarded when the hummingbird lands on their outstretched hand.
- Highlighting objects to interact with or using spatialised sound effects to direct a user's attention to a particular spot. Or using other attention direction techniques such as light rays and thought bubbles.

We are going to focus on the use of speech and text which is really the lowest common denominator but which provides a huge usability boost over leaving the users to figure it out for themselves. So what we are talking about is a text element floating in 3D space that coincides with a voiceover or put another way, audio instructions with subtitles. The text might float a small distance from the user and follow along with them as they move. I suspect it varies from user to user but, for me hearing instructions seems to work better and feels less demanding than reading them. Either way, a lot of HoloLens apps I have used use this technique to some degree.
Now, some voices are more pleasant to listen to than others and mine is in the latter category so the first barrier would be finding/paying a voice actor to record the tracks potentially in multiple languages using some half-decent recording equipment. Once recorded, of course any changes would mean another recording session. This might not be worthwhile for a lower budget app.
If only we had some way to easily generate a human voice from some text…
Luckily the technology has evolved a bit since 1939 and fairly recent advances with deep learning have pushed the capabilities on somewhat since the early days and I think is has become viable to use a text to speech service to generate a decent sounding voice over.
Let's instead focus on a particular voice tool, look at its capabilities and see how we can leverage it for a simple use case.
I looked around for something quick and easy to use maybe a year or so ago and ending up recording my own voice so I wasn't that hopeful but then I recently checked out Azure Speech Services.
Azure Speech Services
I'm not going to delve into the finer details of this service so will leave some links so you can get a better understanding of the capabilities beyond those that we use here:
Azure Text-to-Speech updates at //Build 2021
What's new with Speech: Custom Neural Voice now in GA
So, let's see how we can use this and put it into an application. I'm going to use Unreal Engine to demonstrate this as in my most-recent side project I created a reusable element on top of Ux Tools to achieve this.
Note that this would be very simple to replicate using Unity.
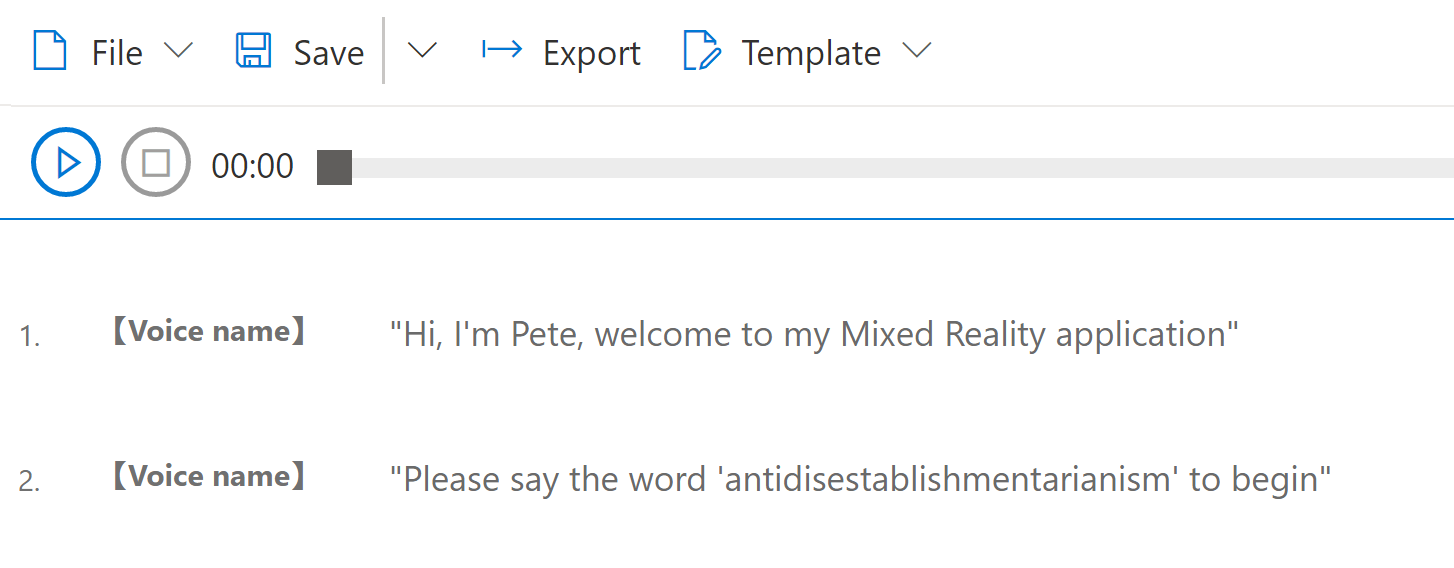
The first step would be to create the audio and text for our script. This is what we will use as an example:
"Hi, I'm Pete, welcome to my Mixed Reality application"
"Please say the word 'antidisestablishmentarianism' to begin"
You need to have an Azure account and add a Speech service resource before you can use Speech Studio. There are some instructions here
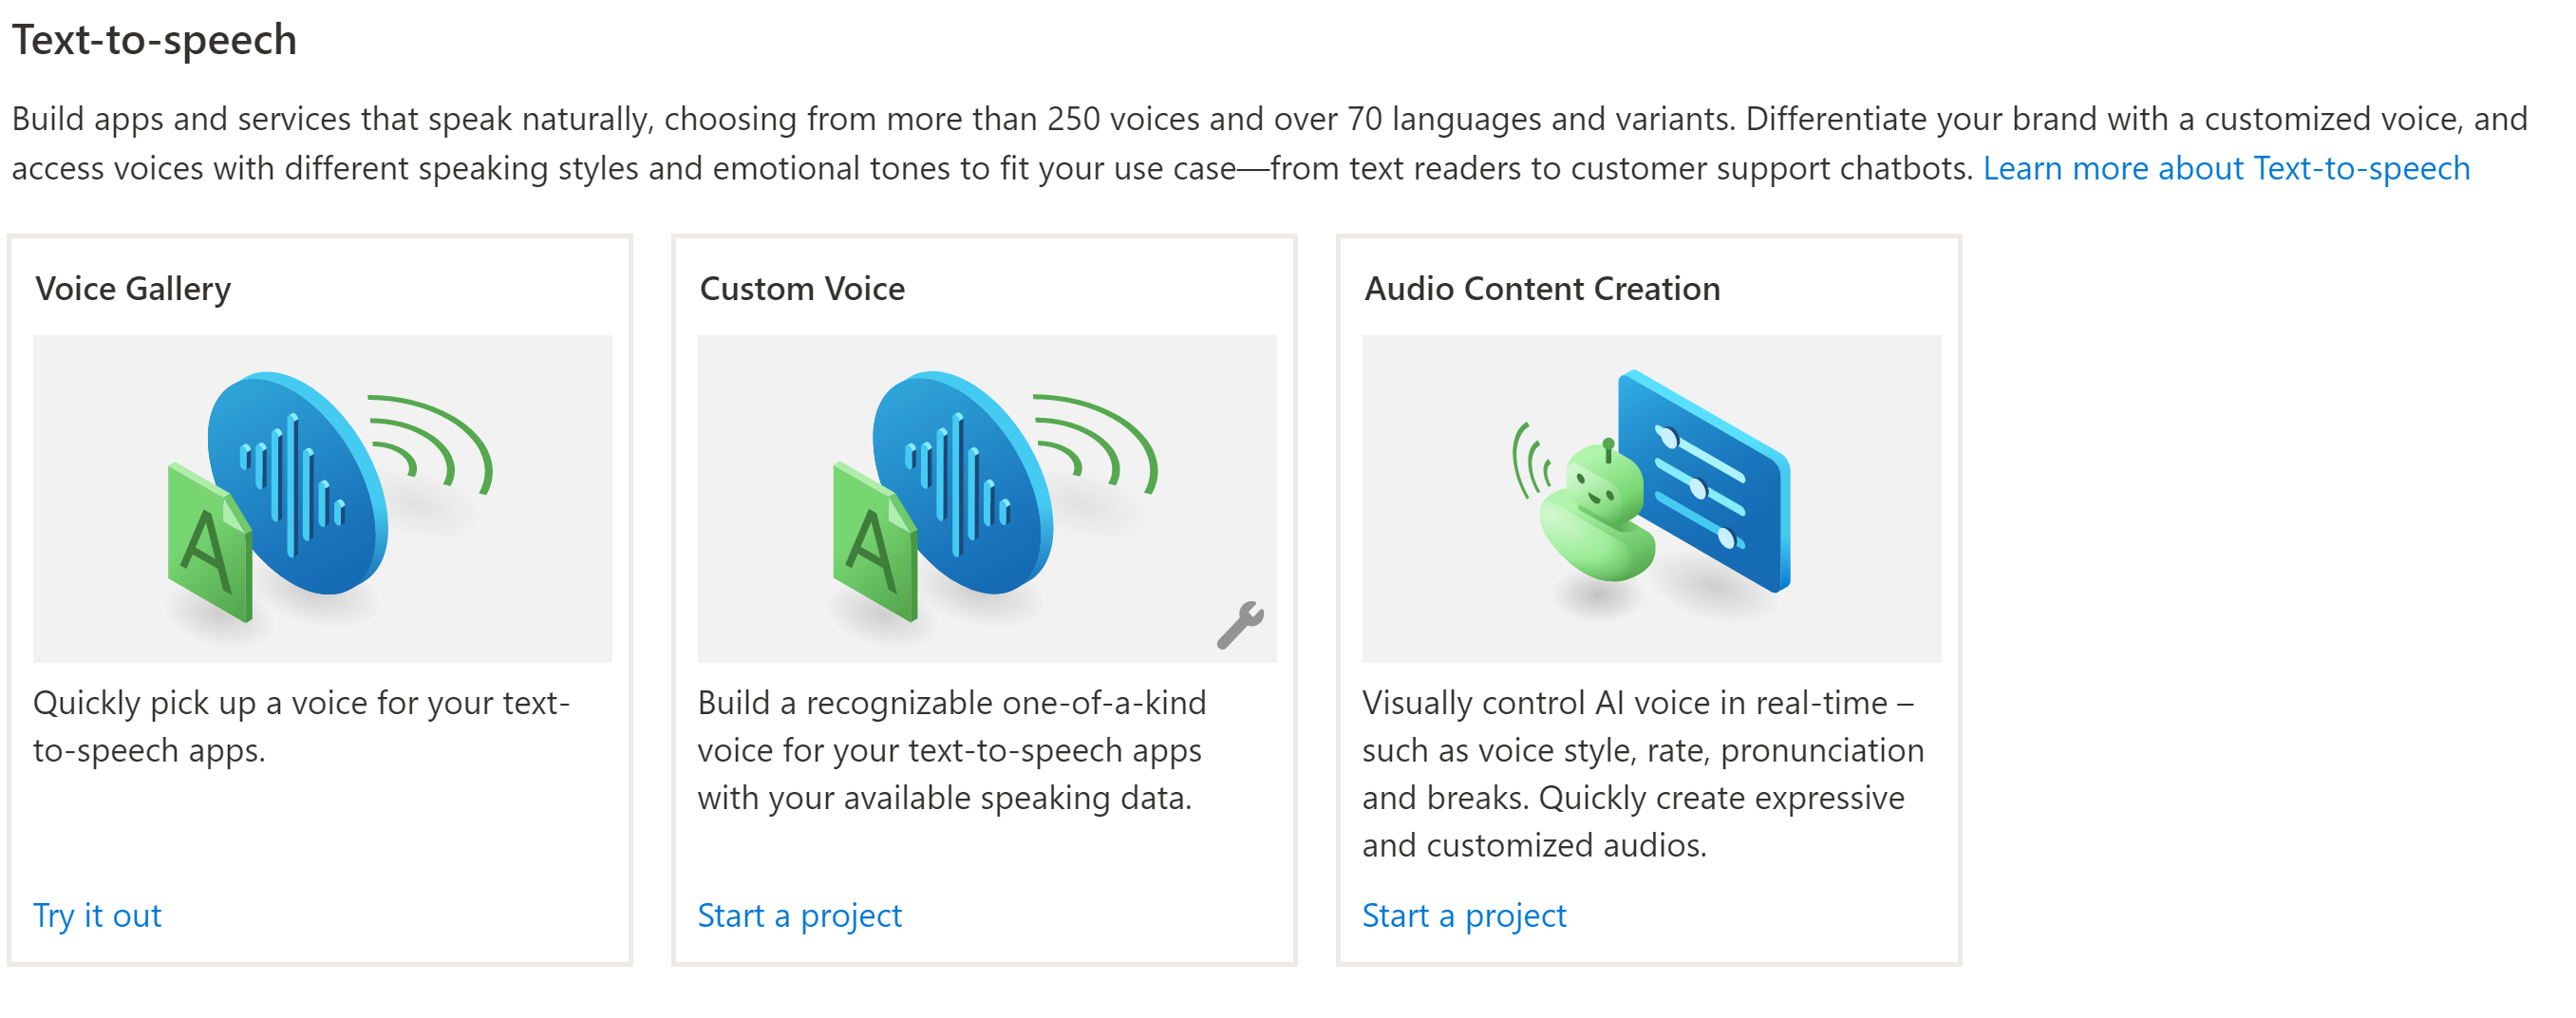
Once you have speech studio set up you can start an audio project:
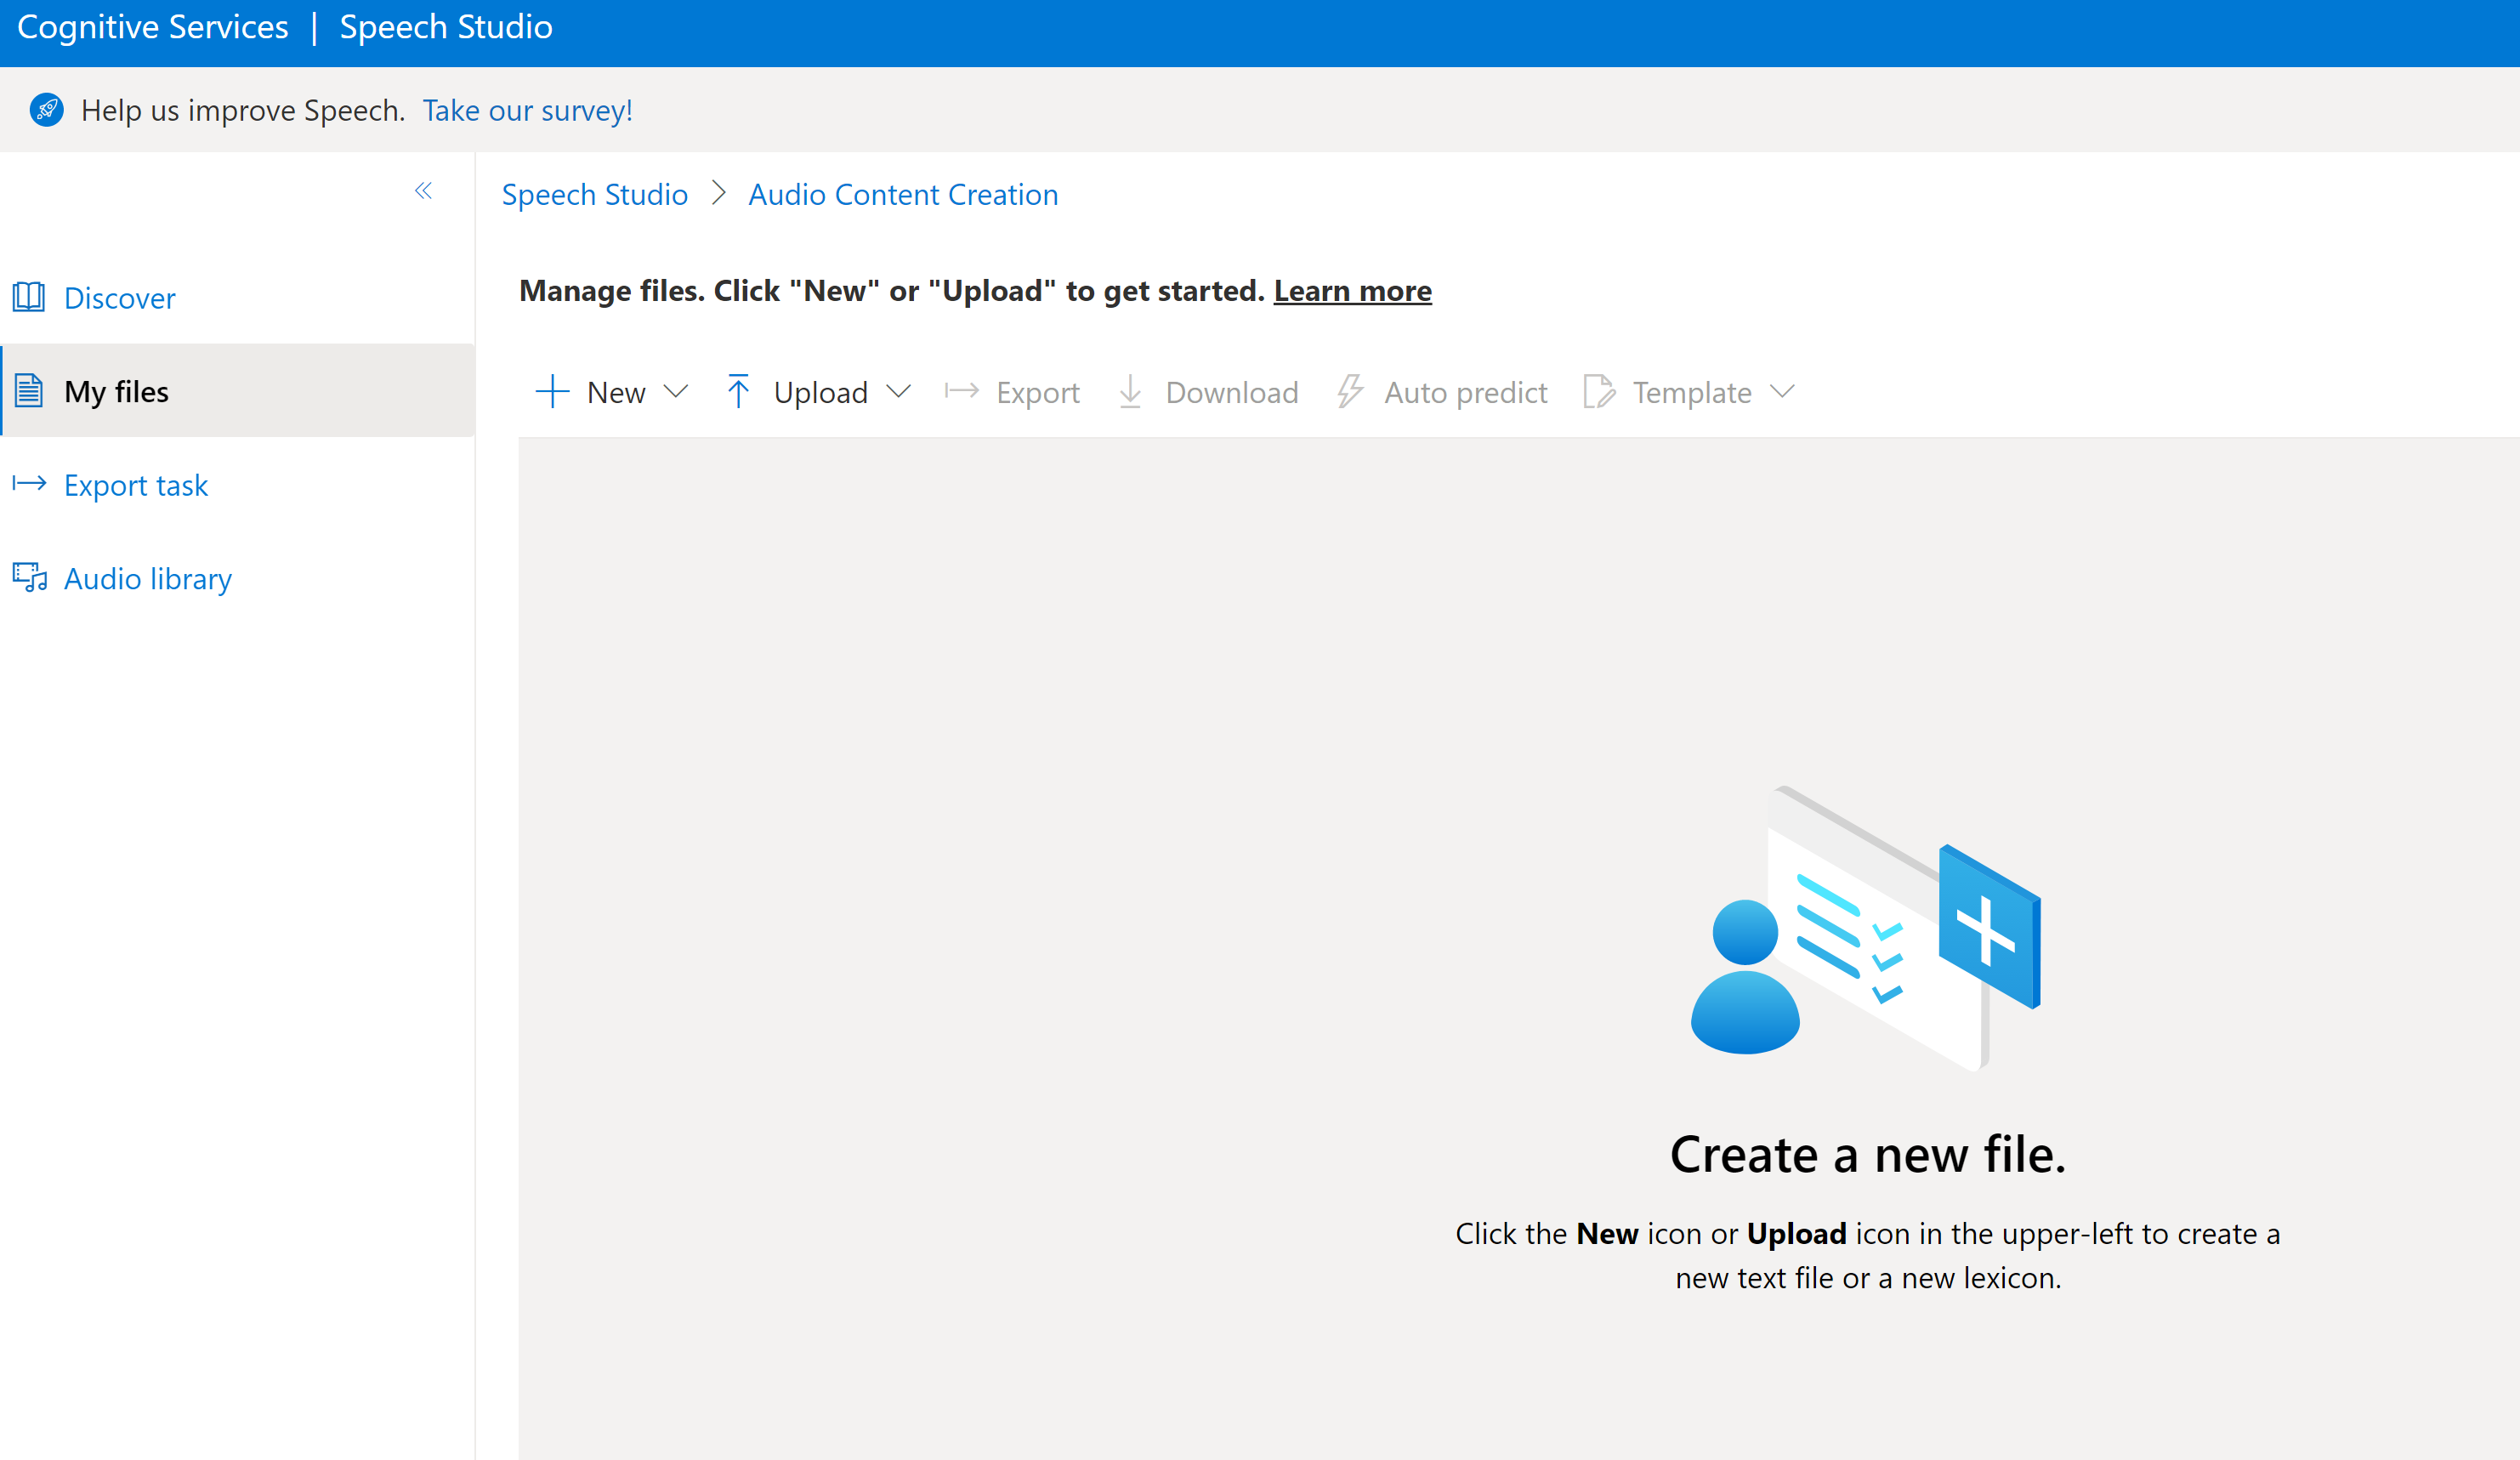
When inside your project you will see this screen:
There are a few different ways into this but I'm just going to start by creating a new file:
I'll start by pasting in my text…
You can choose a voice. I wanted a UK accent so I chose Ryan (United Kingdom). You can check out the default results in the video below:
Now, you can also take full control over how this audio sounds, the intonation, rate, pitch, etc. of each spoken word and also control the length of pauses between words. For this example, I'm happy with the sound and pacing but for a recent project I ended up making some changes and ending up with audio I was very happy with.
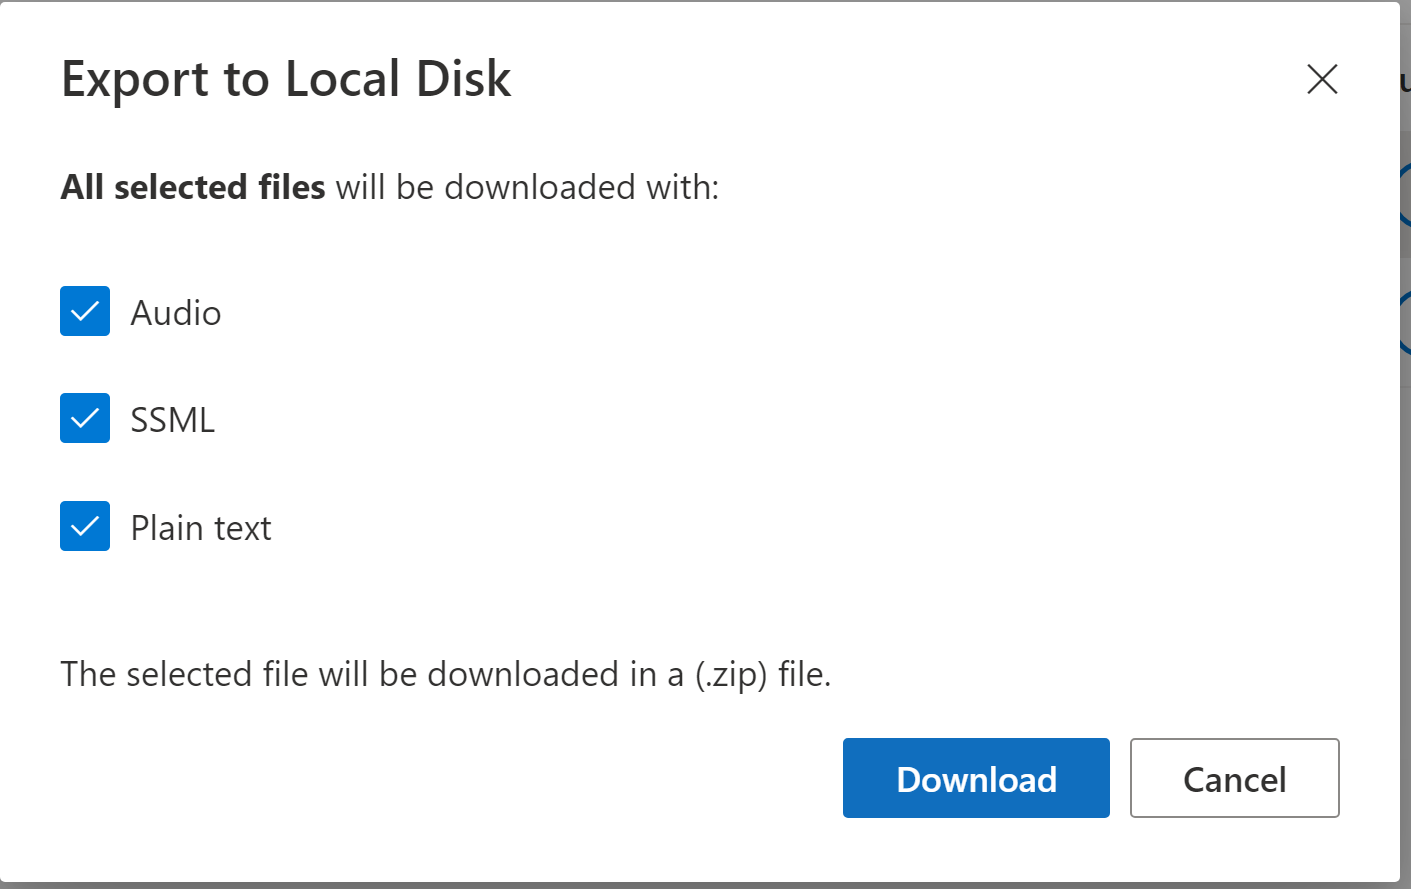
Then export the audio/text to your library or to disk.
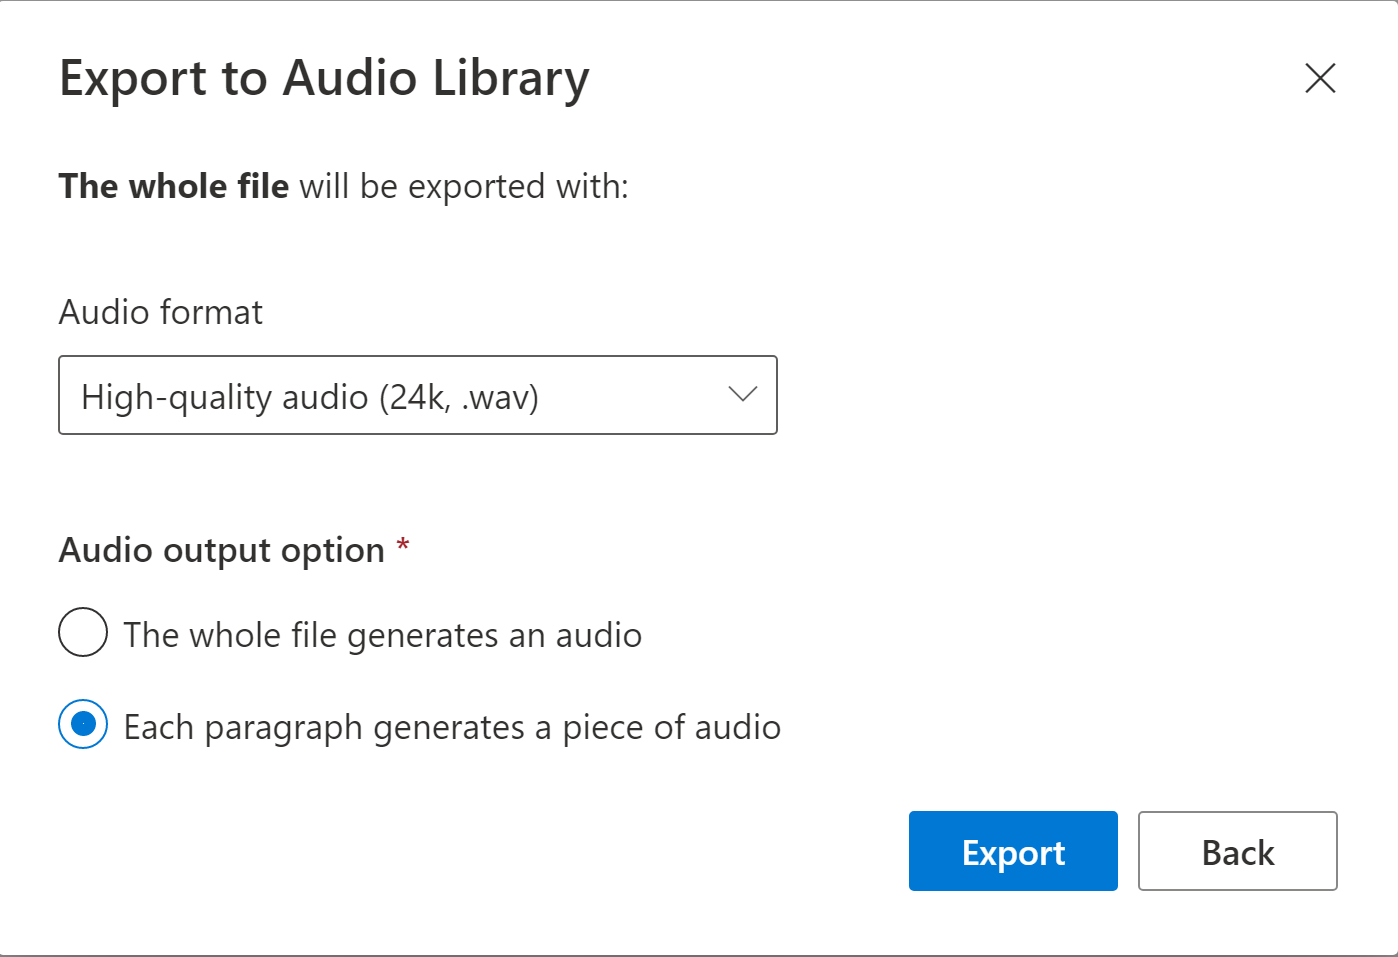
This creates a wav file and a text file for each paragraph that can be downloaded.
A Reusable Voiceover Widget
(using Unreal Engine and UxTools)
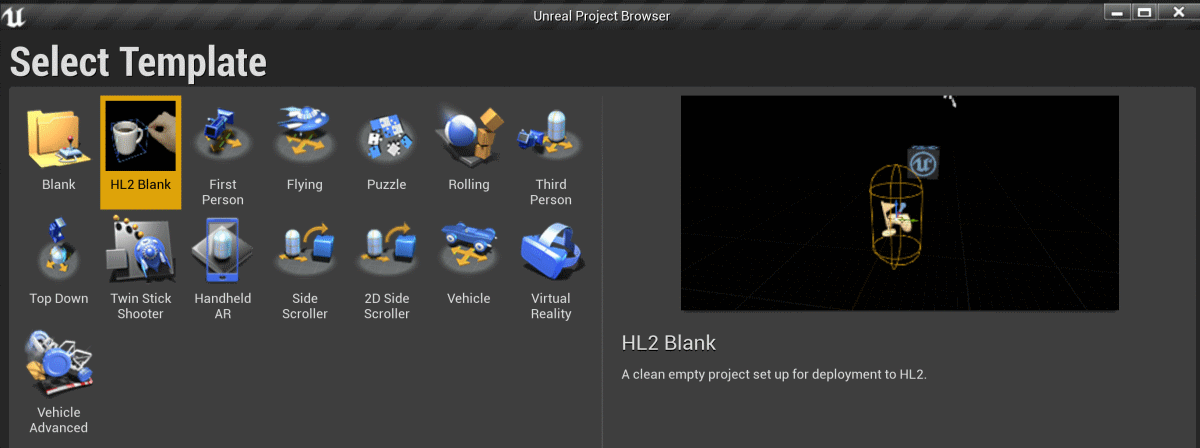
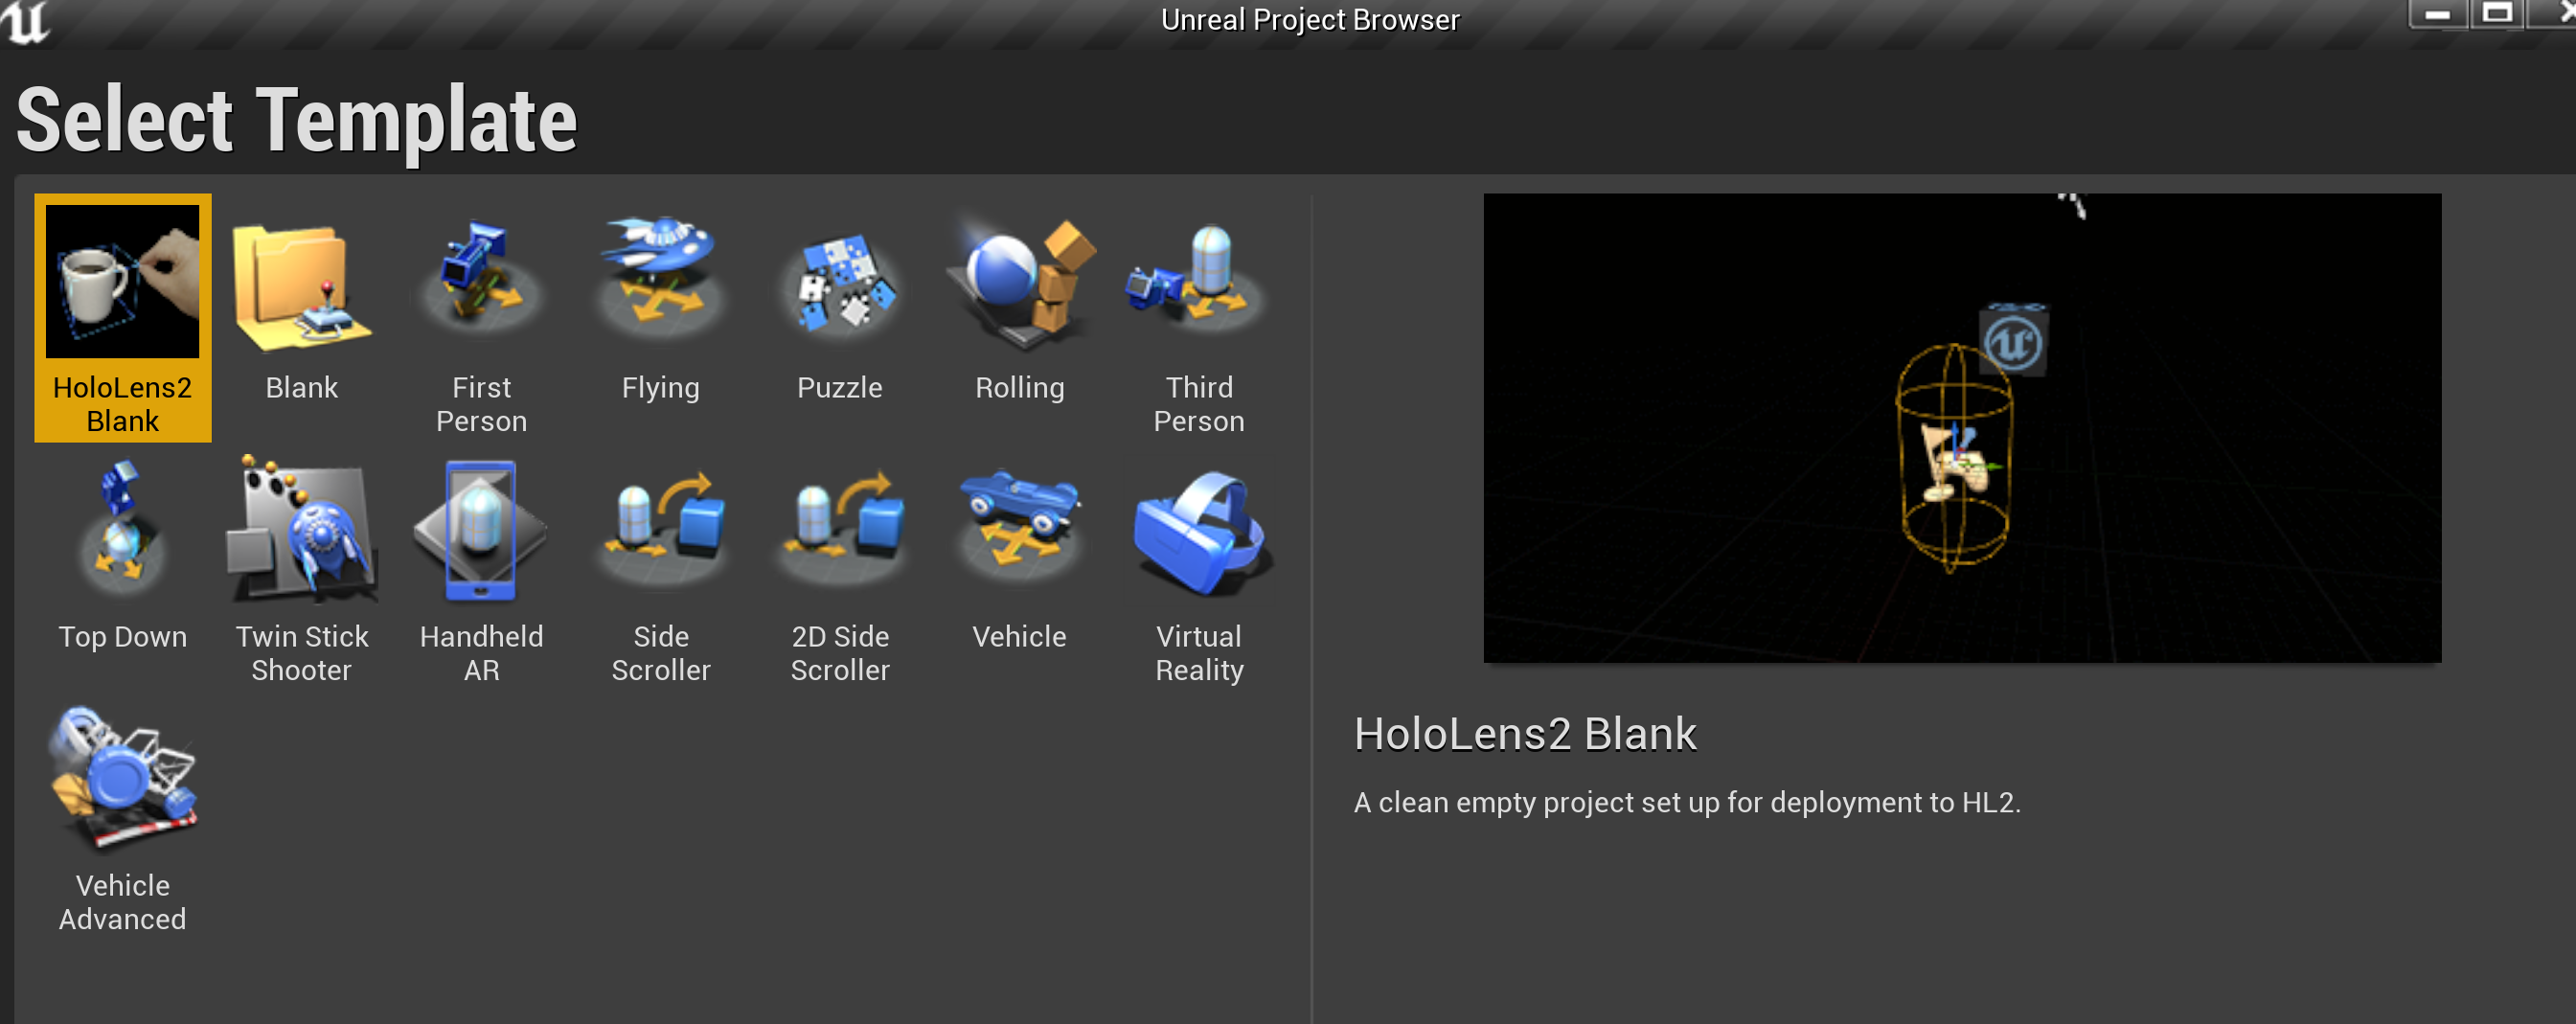
This will bootstrap a HoloLens project configured with plugins for OpenXR, UxTools and Graphics Tools.
I used my project template that I created in a previous post (see Unreal Project Template. Alternatively, you could follow the official tutorial here
These are the steps required:
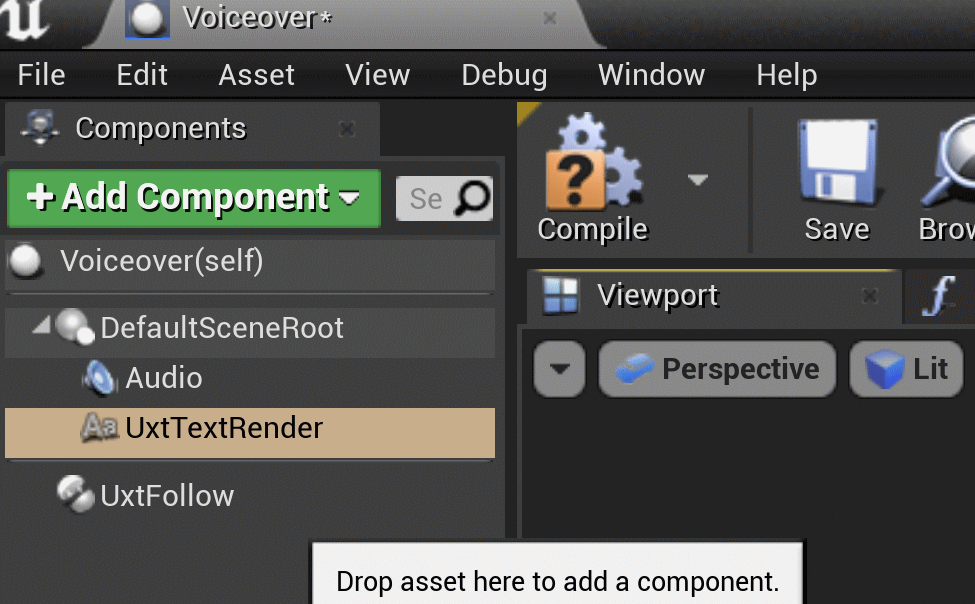
- Create a new Blueprint based on Actor
- Add a Uxt Follow component to the Blueprint
- Also, add an Audio component and a Uxt Text Render component
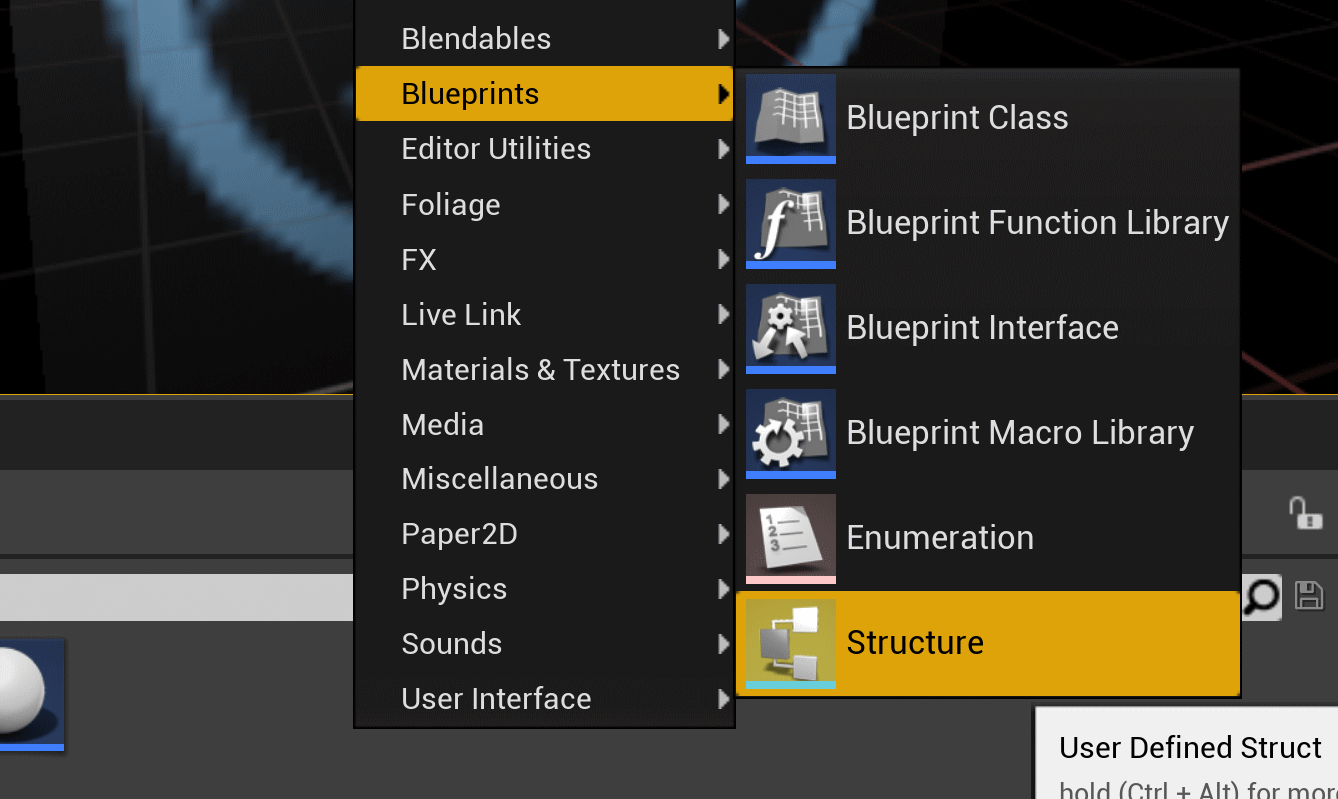
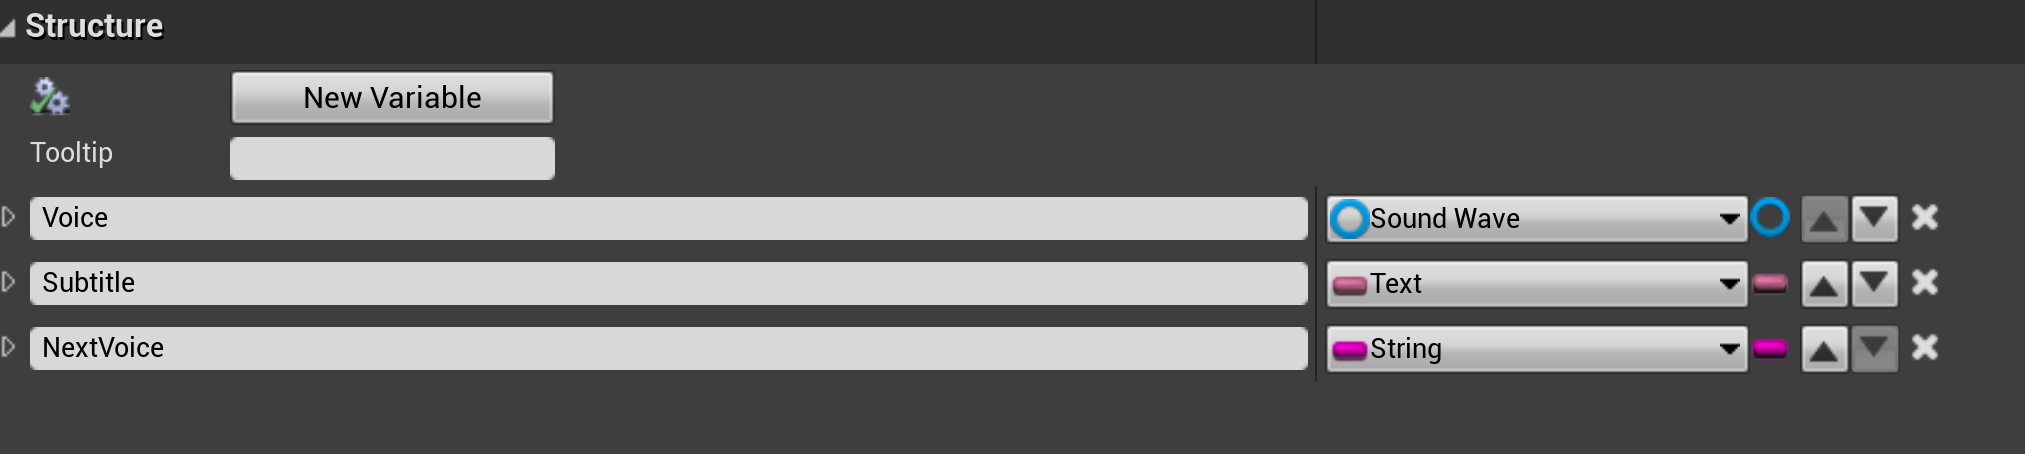
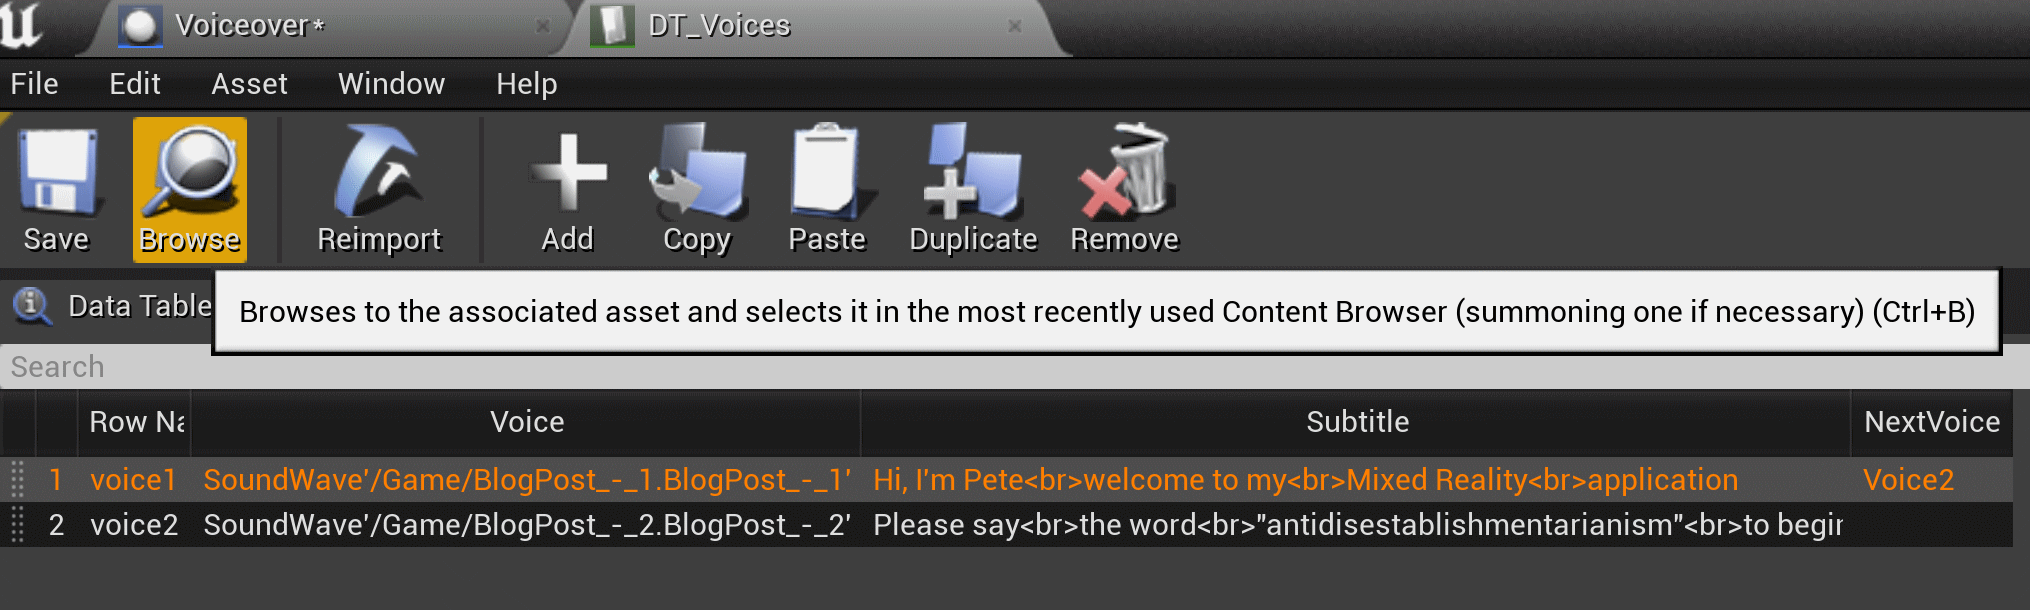
- Create a Struct to hold data in a DataTable (the struct will hold a Sound Wave, the text for the voice over and a string indicating the 'next' voice to select)
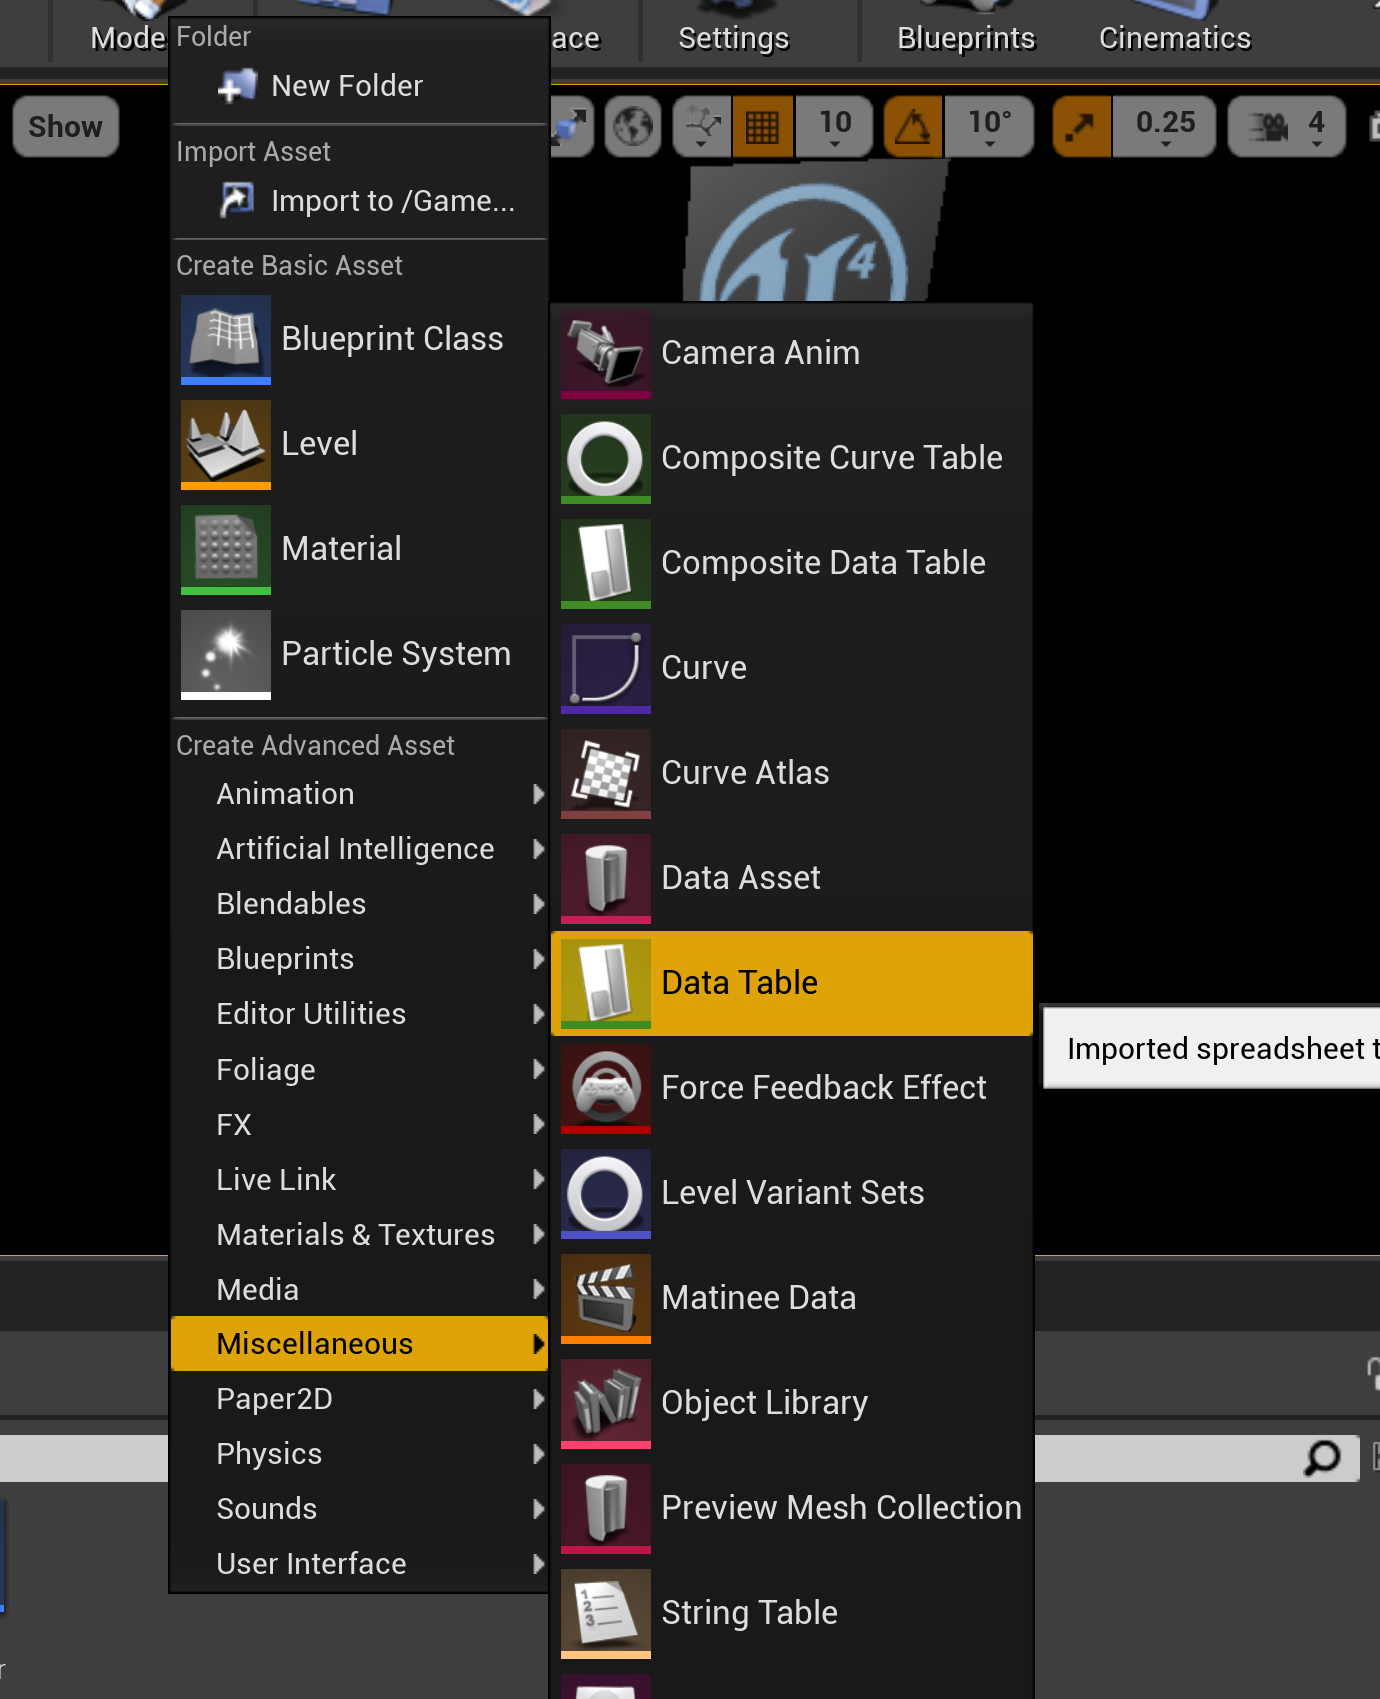
- Now create a DataTable and populate it with instances of the new struct (you can drag the wav files into your content folder and then configure a Sound Wave to refer to those assets) and also copy the text from Azure Speech Studio into each instance.
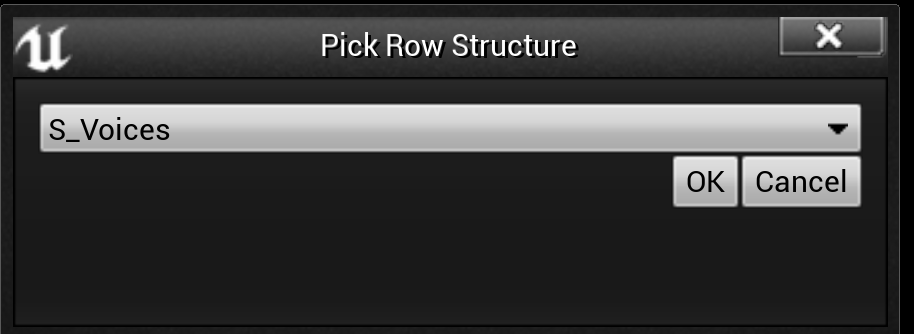
When you create the DataTable make sure to choose the structure as the data type for the DataTable.
As long as you have dragged the audio files into your project Content folder and then you can set up each data row like this...

Note that I use '<br>' to insert line breaks into the Uxt TextRender object that I use to render the text. You should end up with a DataTable that looks like this.
Go back to the blueprint we created earlier and set a reference to the DataTable as a variable in the blueprint.
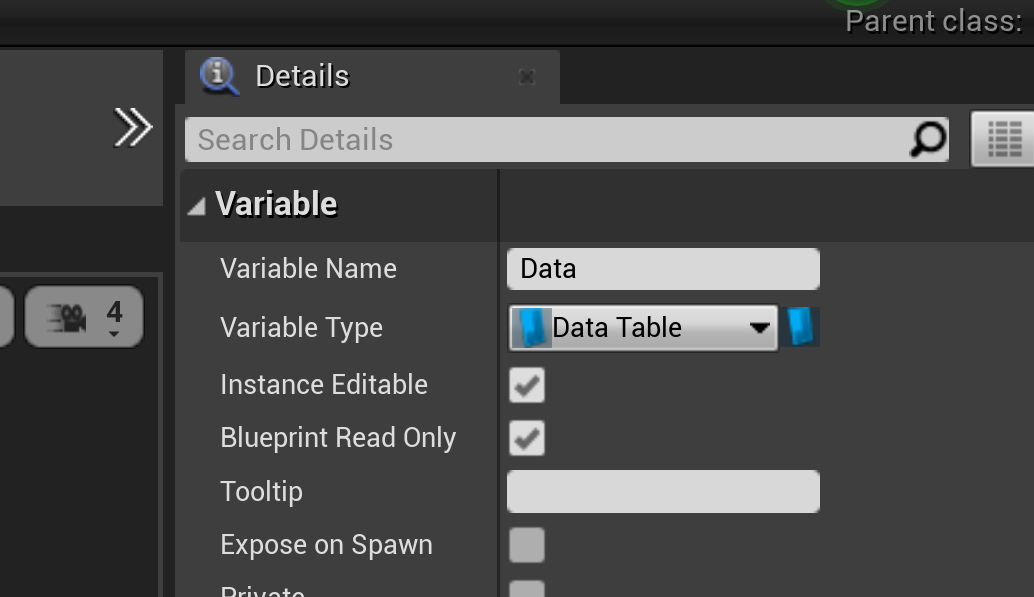
Set the variable as Instance Editable and Blueprint Read-only. We can then set it externally in an instance of our BP that we will create in the level. Then, drag an instance of the blueprint into the level

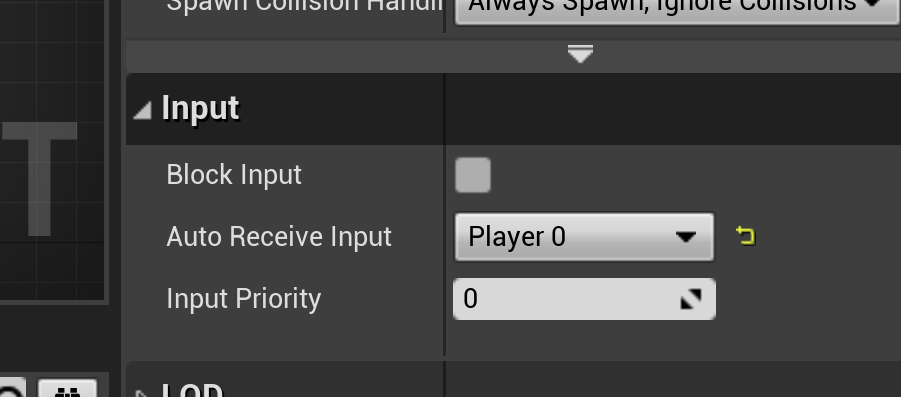
And set the DataTable instance we just created into the reference variable we added to the blueprint. Now we can access the data table from within the event graph of the blueprint. Set Auto Receive Input to player 0 so we will have inputs routed to the actor (we will use some voice commands later…)
So, let's write the blueprint code to make it all work…
First we'll create a custom event called Initialise:
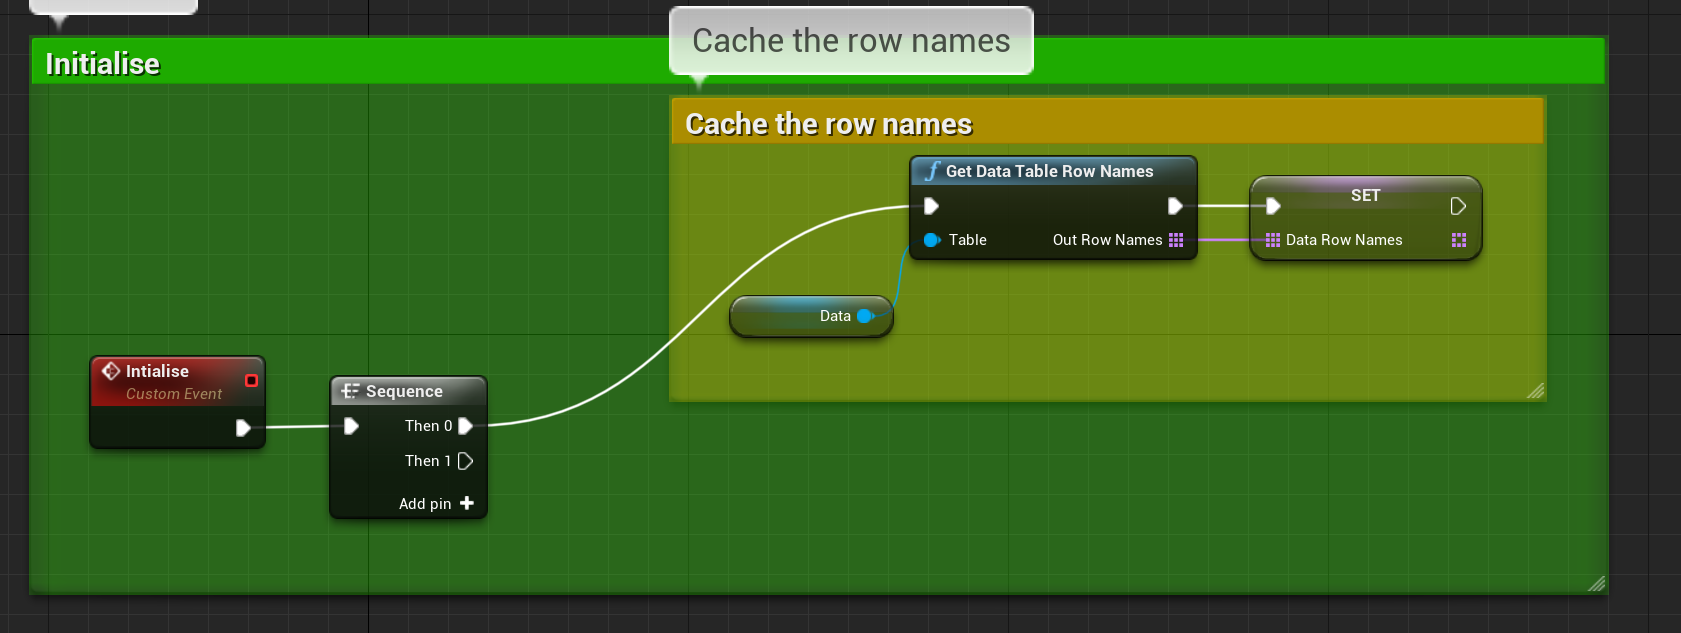
A couple of things to do here; cache the row names for the DataTable into a variable so we can iterate these and then hook up an event handler for when the audio player state changes. Notice that we are also passing the 'NextVoice' into the Custom event and initialise this variable to the first voice.
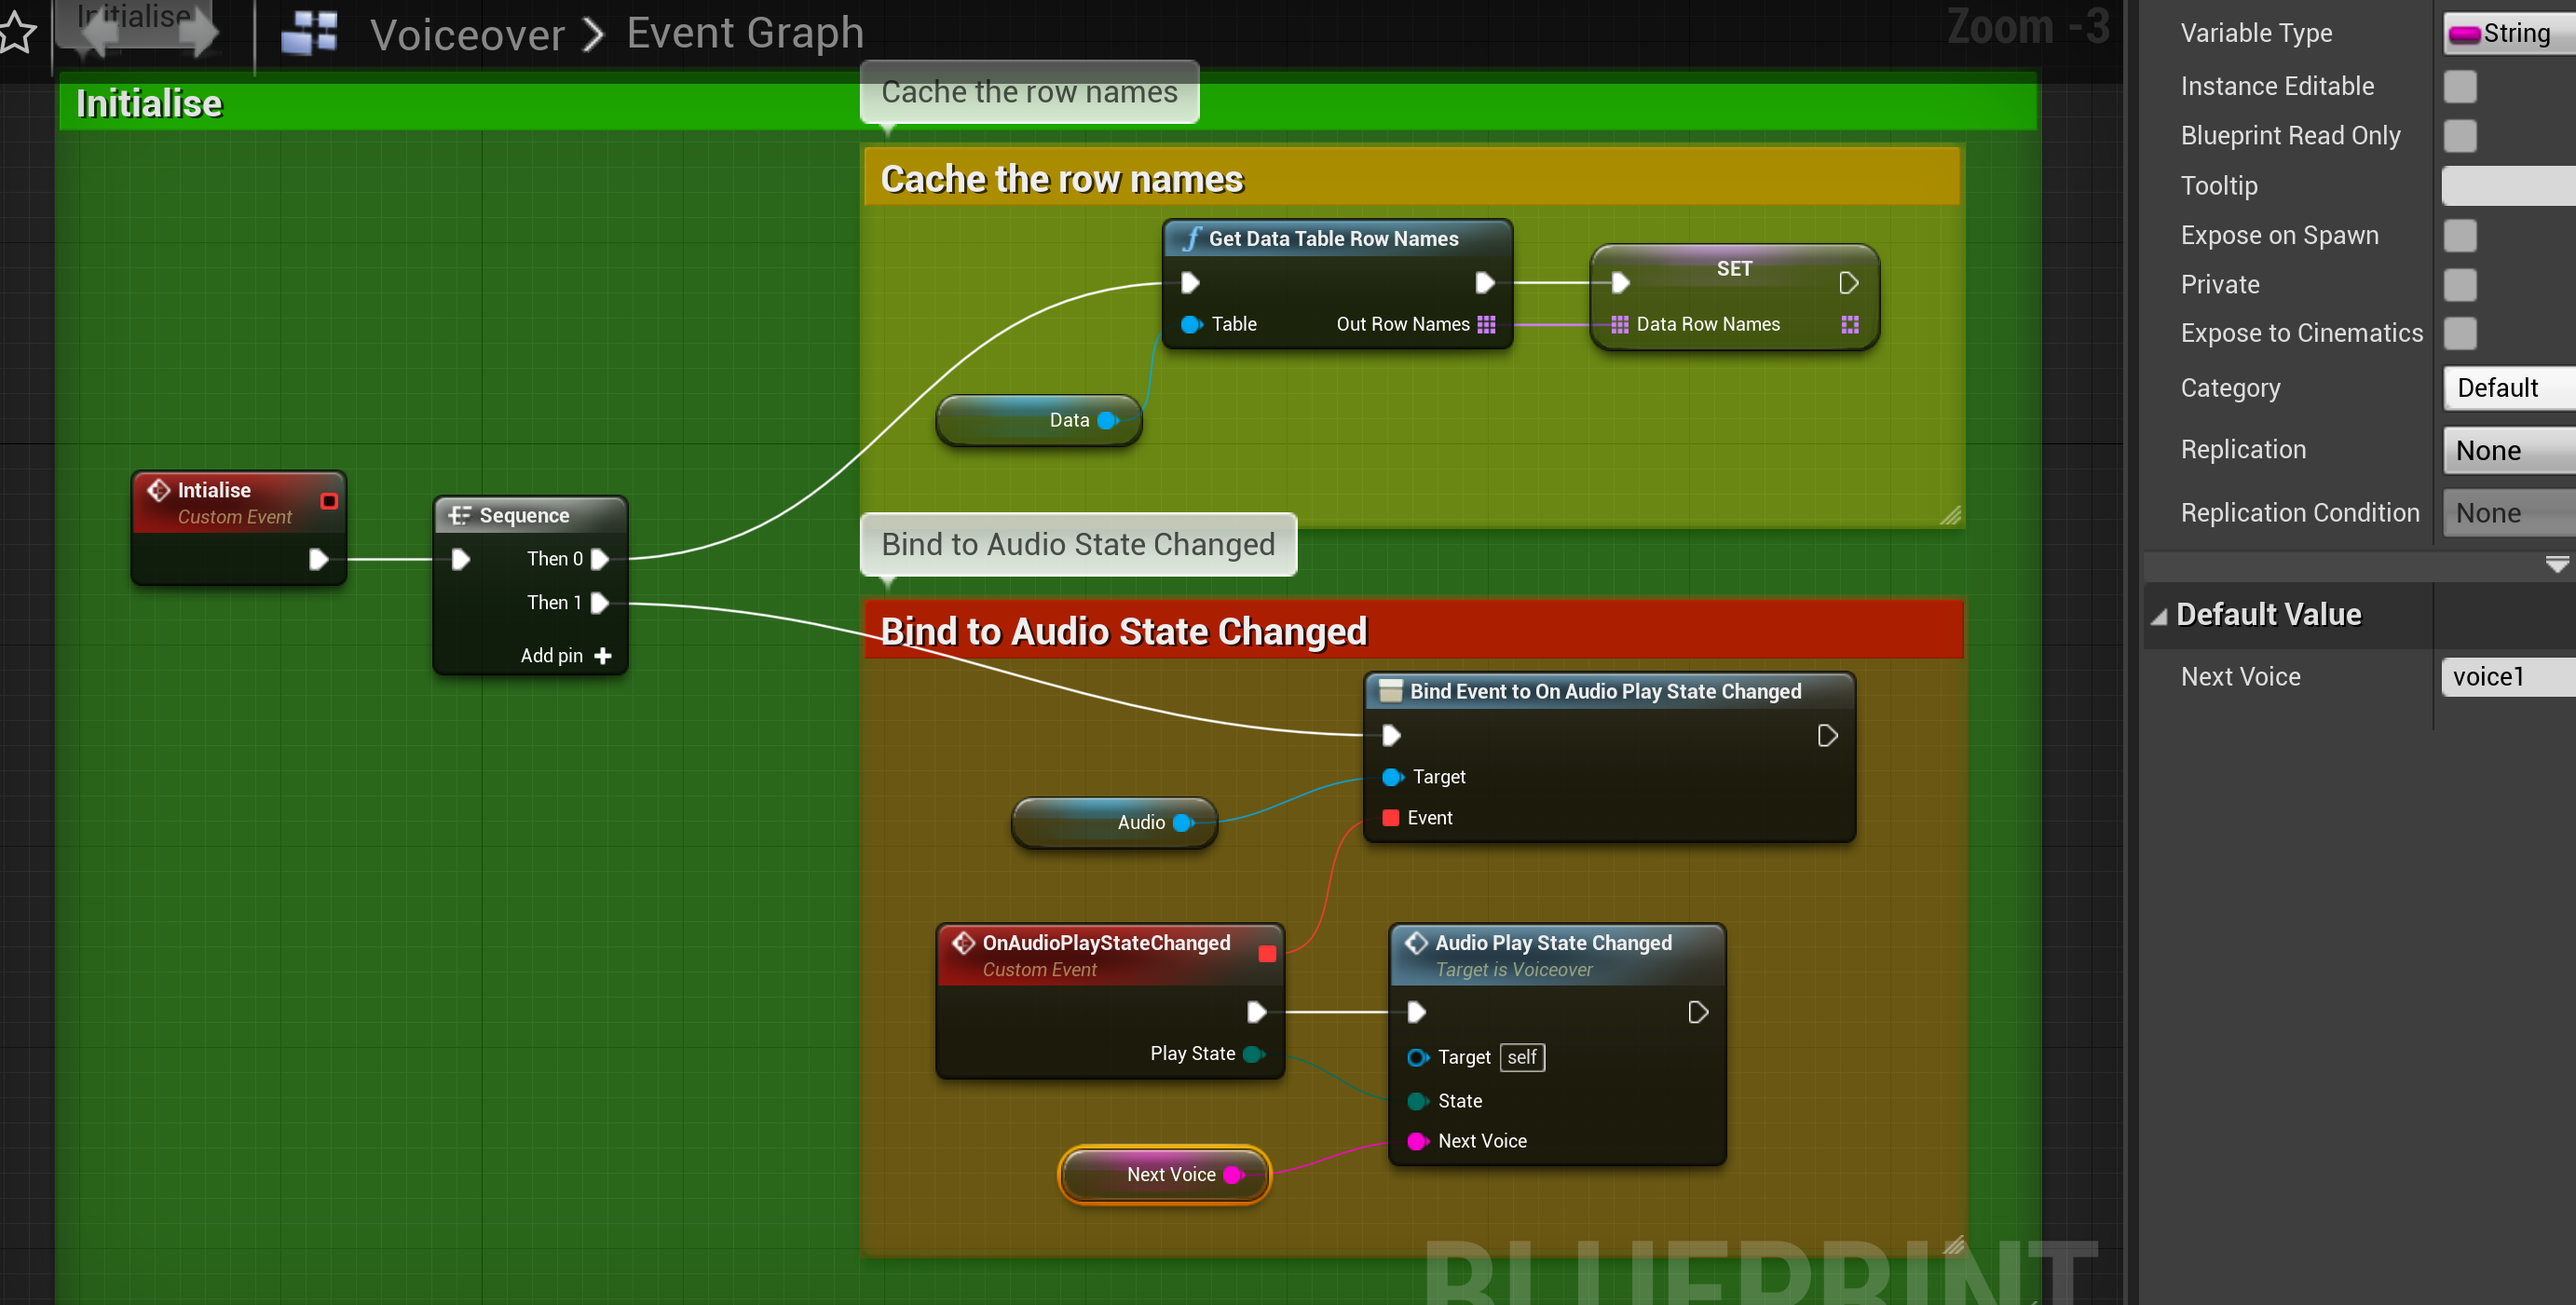
We'll leave AudioPlayerStateChanged blank for a while whilst we create a custom event for switching voices.
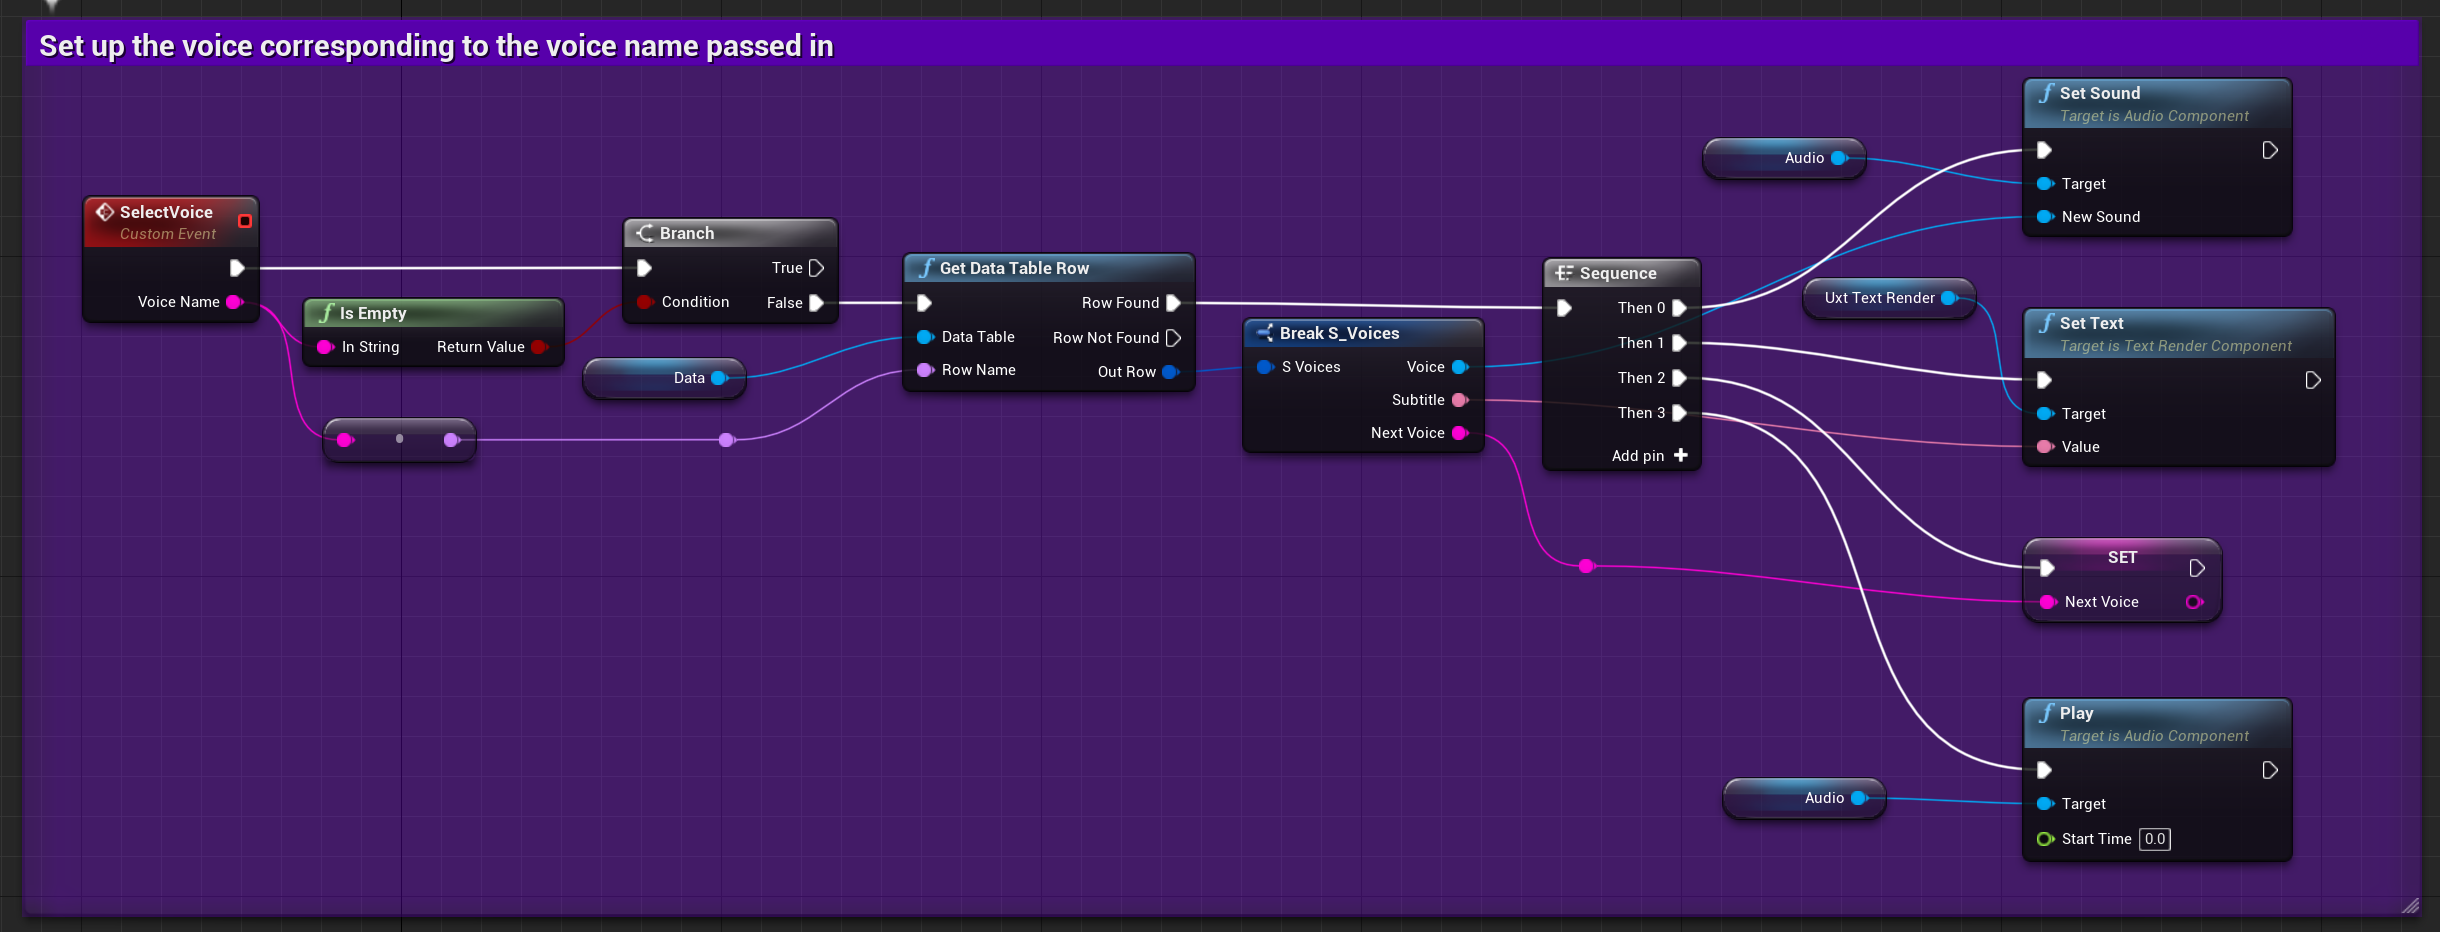
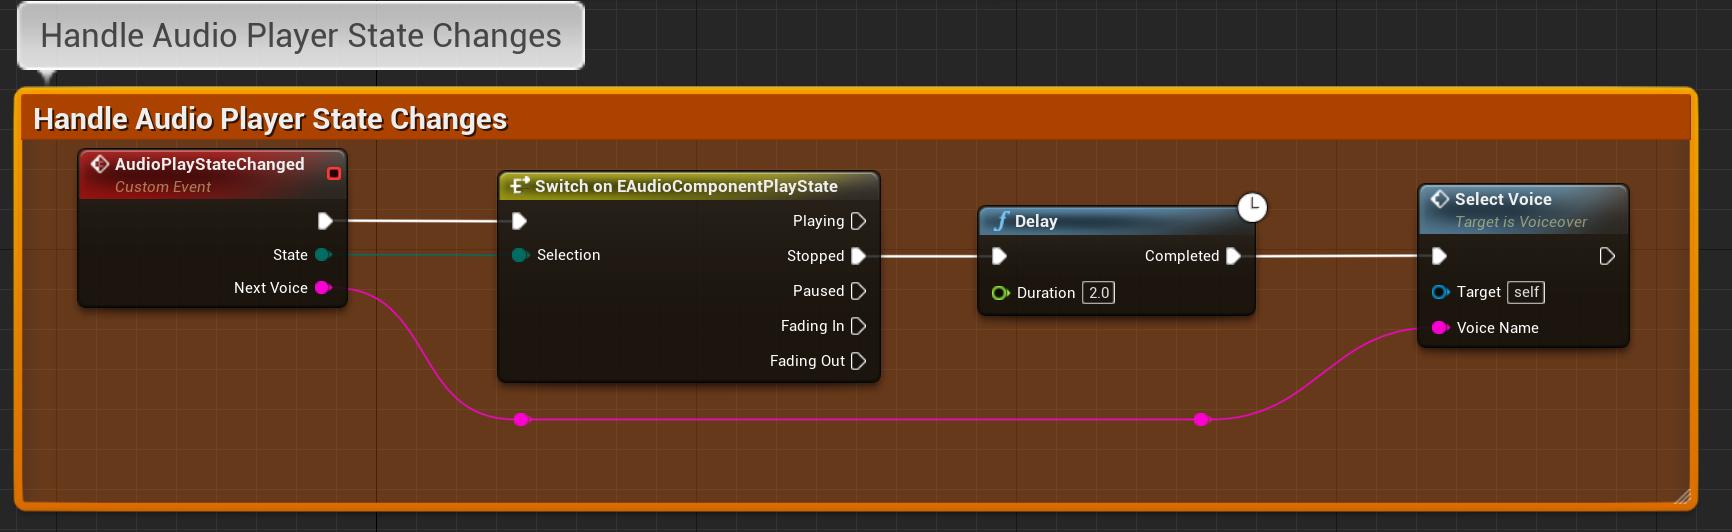
This one is slightly more involved but consists of a custom event that takes a voice name as a parameter and will configure the audio player to play the associated speech sound, set the text in the text render component and start the audio playing. We also set the NextVoice variable so that the next time the Audio Player State changes we will know which voice to set.
Then finally we can fill in the Audio Player State Changed
Now staying in the Blueprint but navigating to the Viewport and selecting the UxtTextRender component we can set some settings to configure the text to appear at the right size, etc.
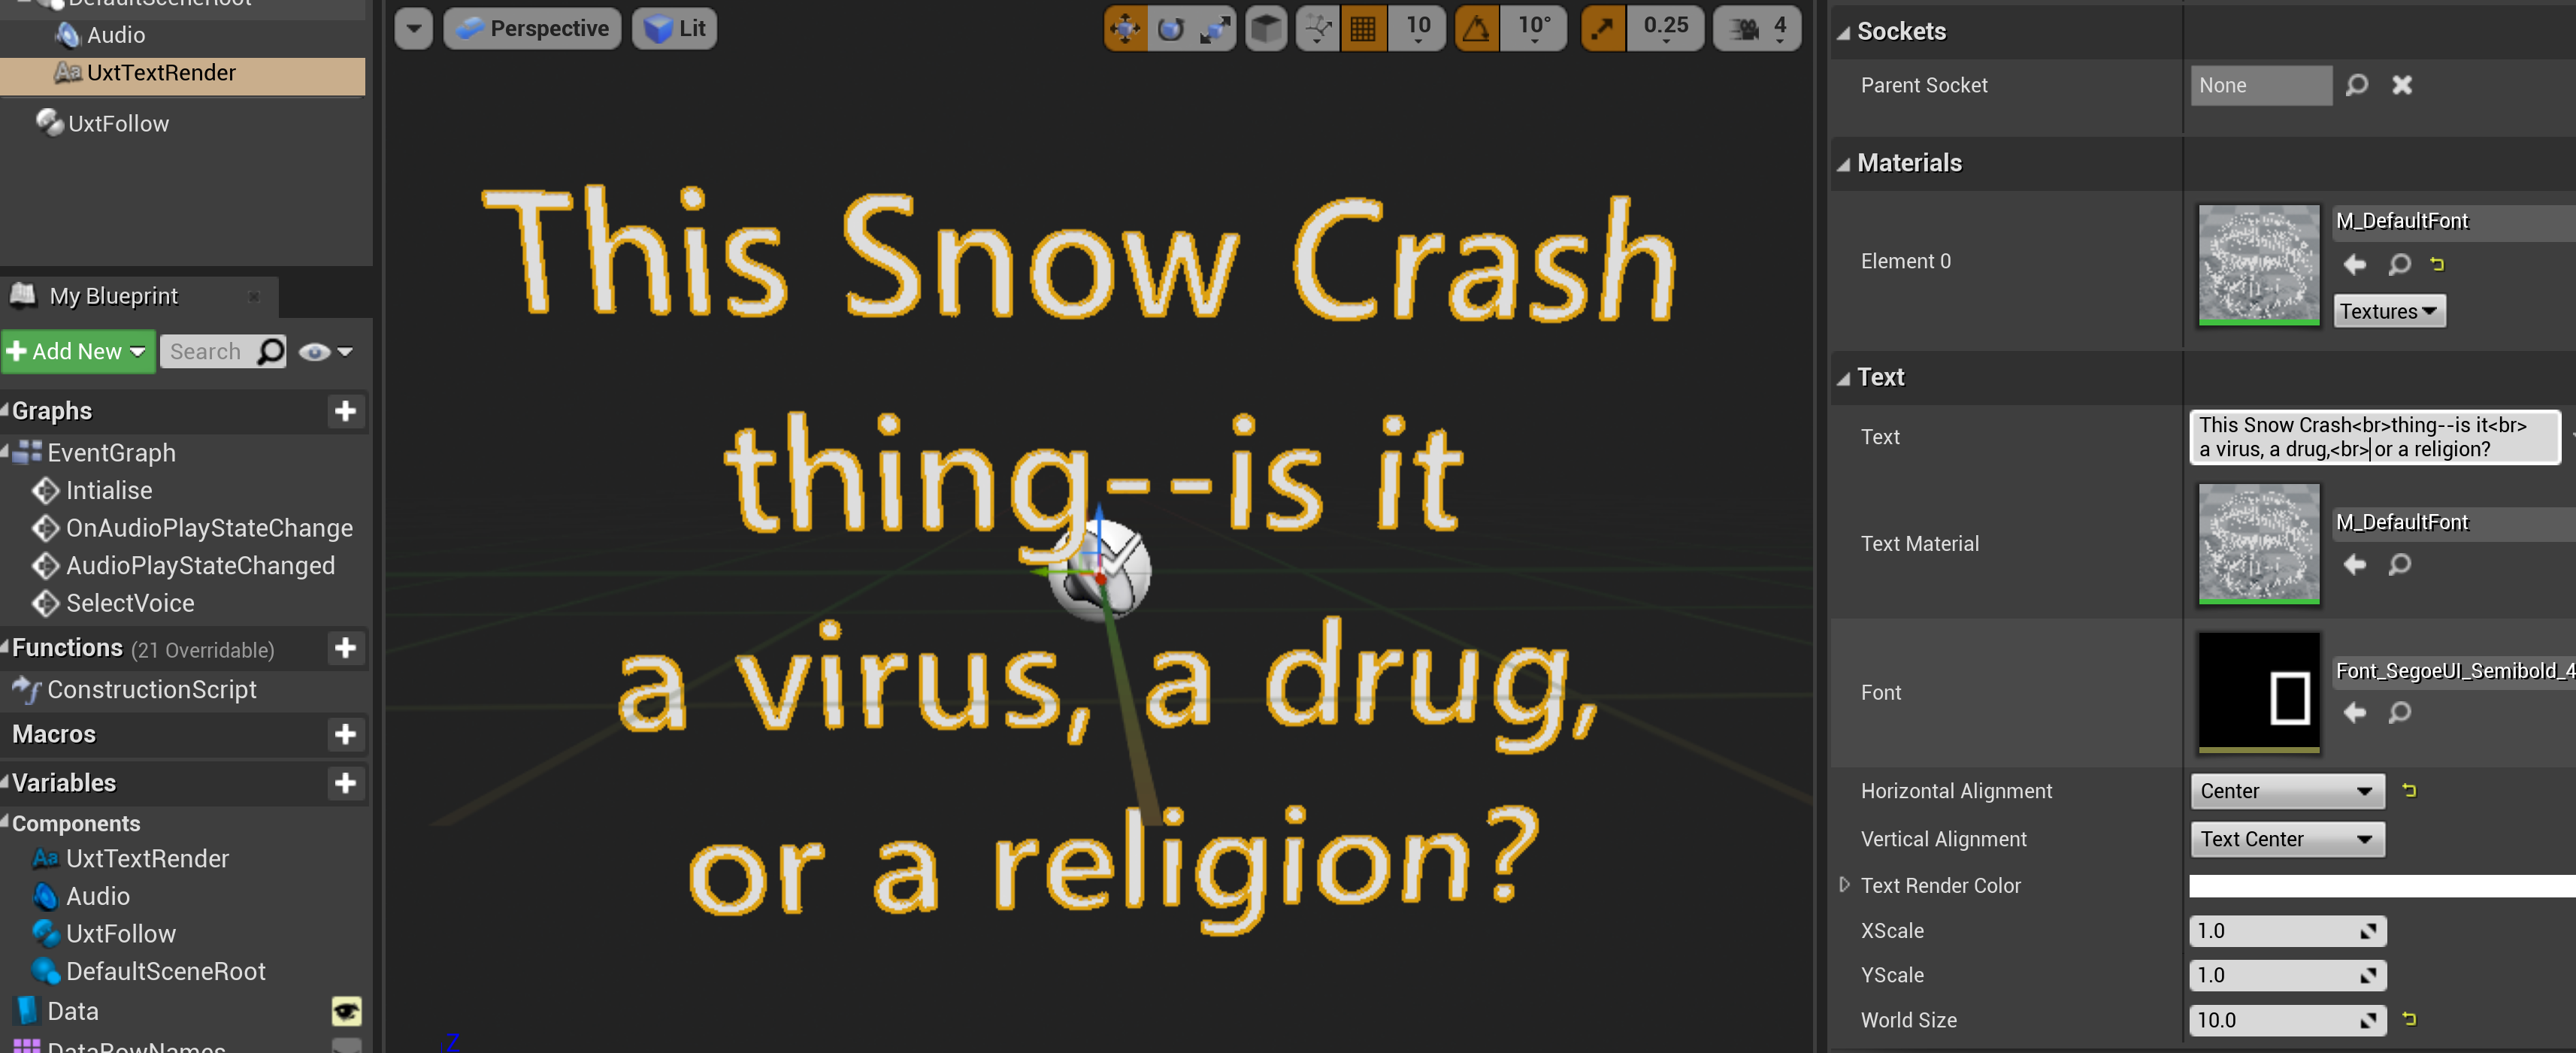
I set some dummy text there so I could see something being rendered, then set the World Size up to 4.0, Centred the Horizontal Alignment. Note. The use of line breaks in the input text.
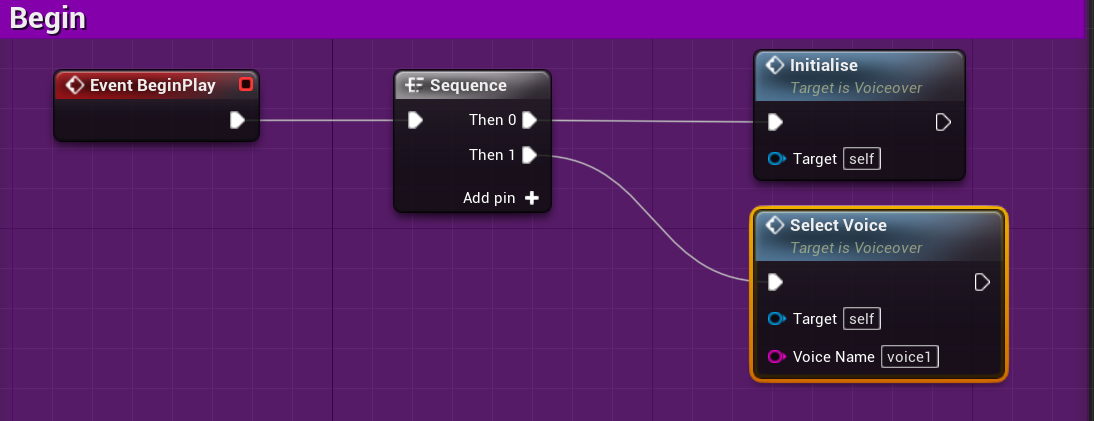
Now, we just need to kick things off. I'll use begin play for that…
So, initialise and then select the first voice.
I won't put in the voice command as this post is now longer than intended but that is just a case of declaring one in the input settings for your application…
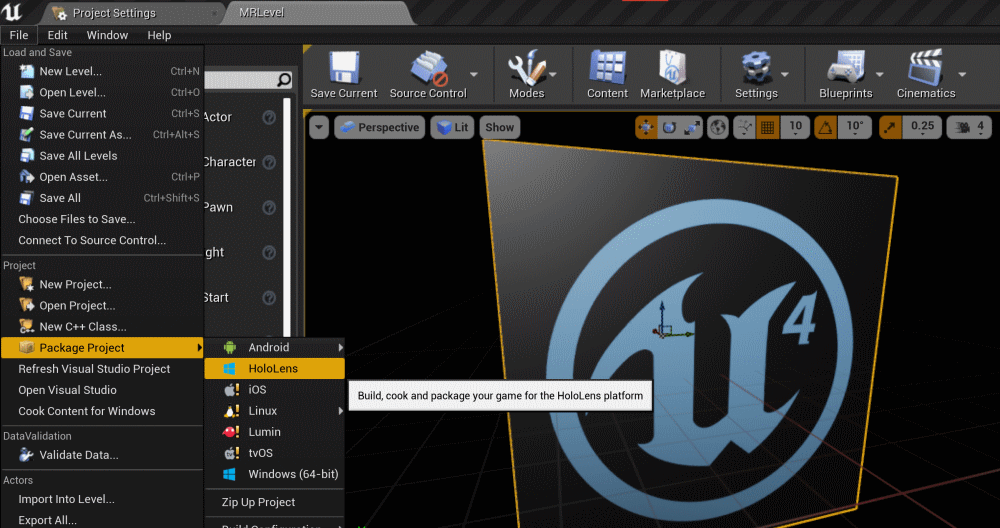
Now, package up the project for HoloLens,
Once packaged we can sideload the app using the HoloLens developer portal
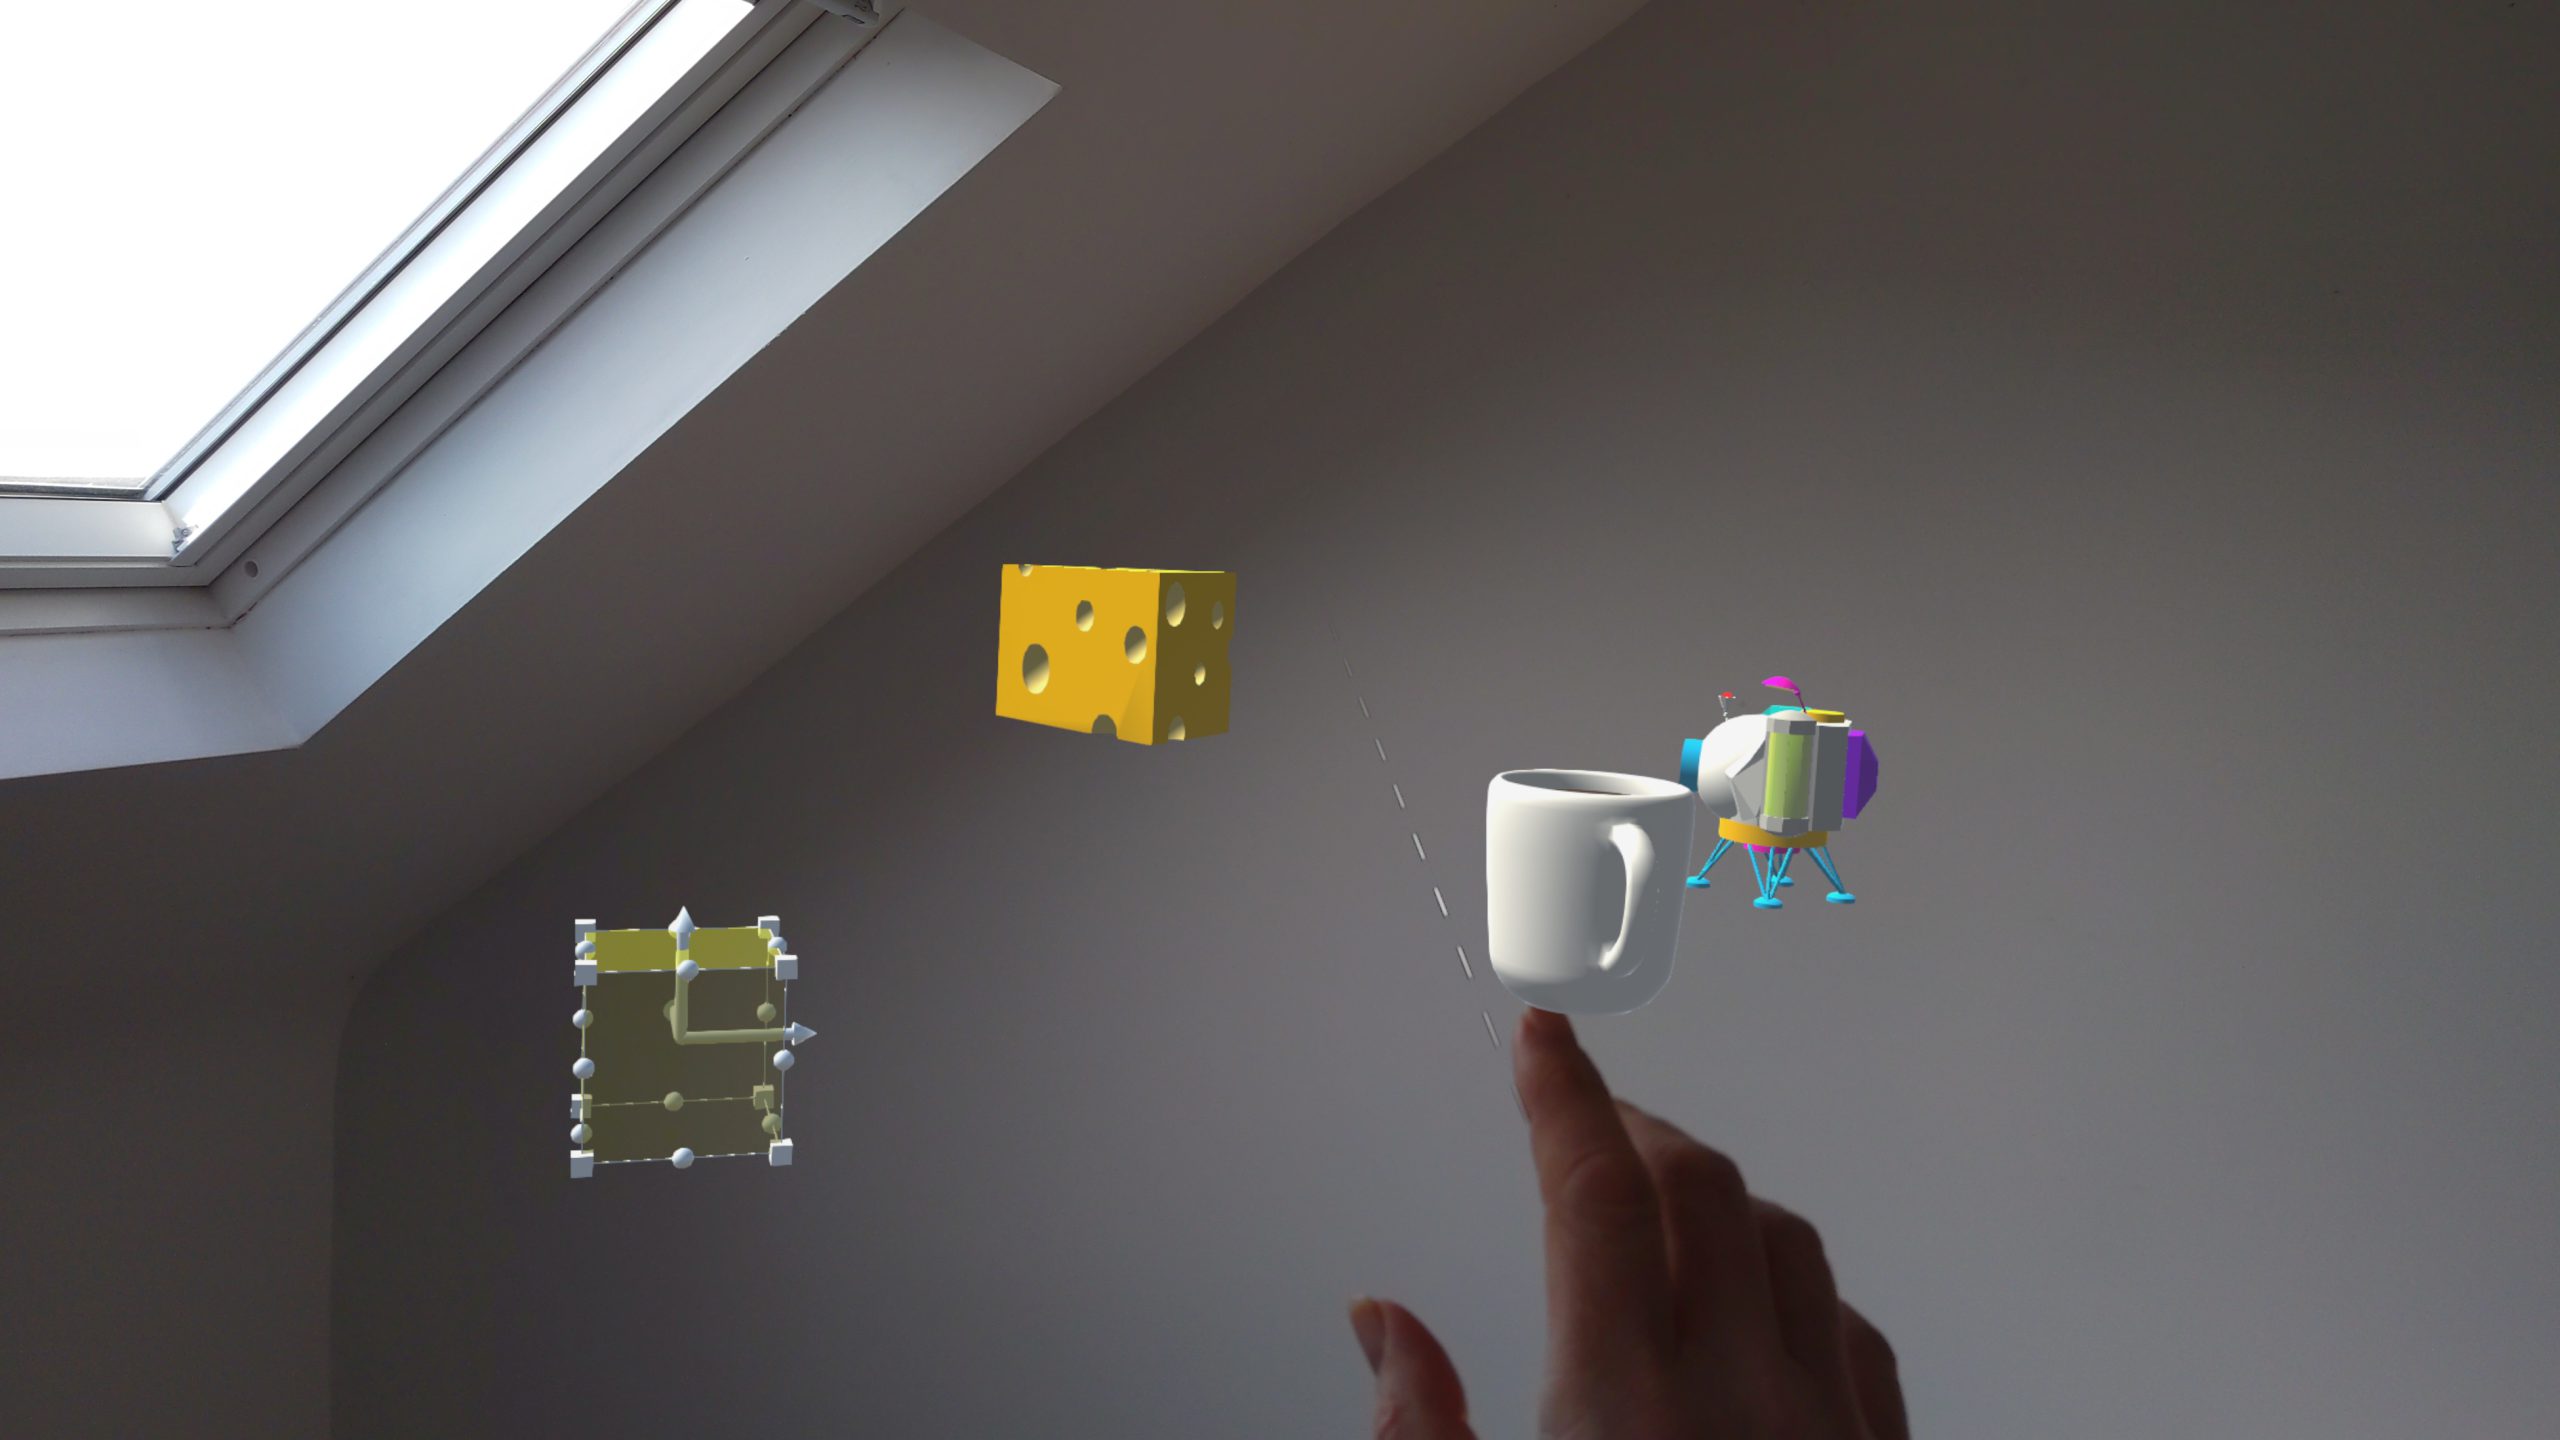
And the results of this look like this....
And there is a project over on Github with the source here.


Comments